Difference between revisions of "Email - Setting up E-mail clients for SME 8.0"
m (Changed to Skill level Easy as it is already defined, whereas Low was not) |
|||
| Line 11: | Line 11: | ||
This Howto was tested on a system where the server is used as the outgoing SMTP server for the network. Systems with a Smarthost configured should work in the same way because the fundamental principle is to allow clients to authorise to the SME Server before mail is accepted for transmission. Perhaps someone with such a system can check and confirm this assumption. | This Howto was tested on a system where the server is used as the outgoing SMTP server for the network. Systems with a Smarthost configured should work in the same way because the fundamental principle is to allow clients to authorise to the SME Server before mail is accepted for transmission. Perhaps someone with such a system can check and confirm this assumption. | ||
| − | {{Level| | + | {{Level|Easy}} |
==Things to do in the Server Manager== | ==Things to do in the Server Manager== | ||
Revision as of 23:03, 14 September 2012
Why This Is Needed
From SME 8.0beta6 onwards, unauthorised access to SMTP on Port 25 has been prevented, by design, even for users in the local network, and replaced with SSL-authorised access on Port 25. The result is that setting-up clients to successfully authorise against SME-Server SMTP has become a little complicated. This Howto is intended to give step-by-step instructions using Microsoft Outlook 2010 as an example. The same procedures should apply to most Email Clients, although the locations of the settings may vary.
Thanks
This Howto could not have been written without the help and advice of 'byte.' He doesn't identify himself in his profile in the forums, but he is owed a pint or two next time he hits rural Suffolk!
Assumptions
This Howto was tested on a system where the server is used as the outgoing SMTP server for the network. Systems with a Smarthost configured should work in the same way because the fundamental principle is to allow clients to authorise to the SME Server before mail is accepted for transmission. Perhaps someone with such a system can check and confirm this assumption.
Things to do in the Server Manager
Allow SSMTP
Login to the server manager at http://your_server_address/server-manager and click on the menu item Email. Then click the button labelled 'Change e-mail reception settings.'
Change 'SMTP authentication' to 'Allow both SMTP and SSMTP' and save the new settings.
Things to do in Outlook
Make sure the Fully Qualified Server Name is used
This is necessary because the SME Server's self-issued security certificate uses this name. Servers described by IP addresses will cause Outlook to require that the certificate be accepted again every time the program is restarted and will play havoc with automatic email use.
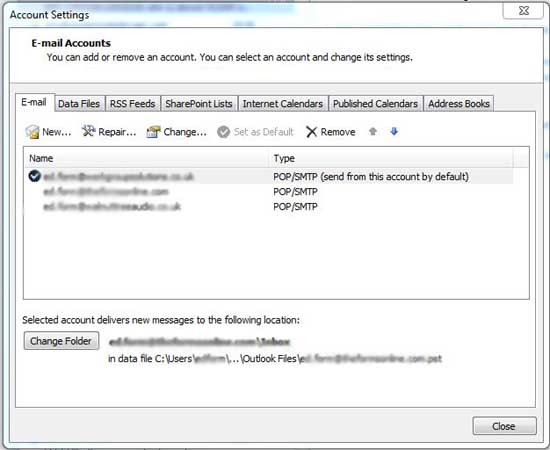
Click 'File' then 'Account Settings' and then the drop-down 'Account Settings' button.
In the 'Account Setings' dialogue, highlight an email account and click the small 'Change' button above.
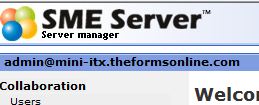
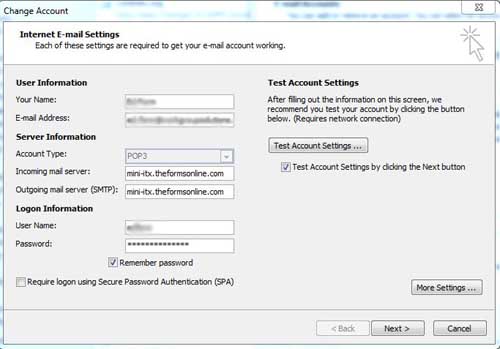
In the first page of the dialogue that results, make sure that both incoming and outgoing servers are entered as the fully qualified name of your server. This will take the form - 'server_machine_name.domain_name.com' [ or .co.uk, .org etc.] and will be as shown in the top left hand corner of the Server Manager screen with the username 'admin' in front. Use the part after 'admin@' - In my case this is 'mini-itx.theformsonline.com,' as shown below.
The Change Account dialogue is shown below with the fully qualified server name in both incoming and outgoing server settings.
Set encryption and authorisation parameters
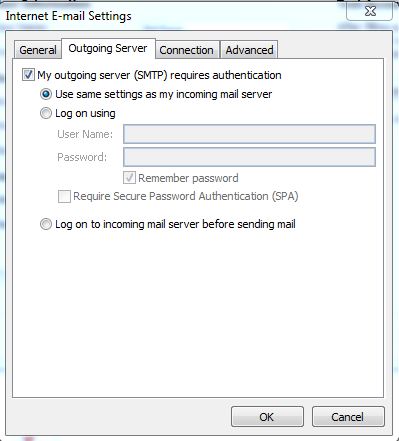
Now take the tick out of the 'Test Account Settings by clicking the Next button' item on this page and click 'More Settings.' Then click the 'Outgoing Server' tab in the resulting dialogue and make it look like the figure below.
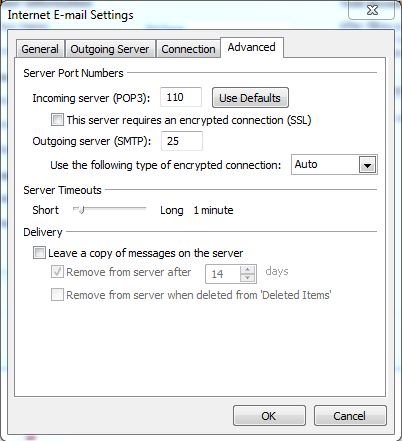
Now click the Advanced tab and change the settings for the Outgoing Server to those shown below - ie. Port 25 and Auto encryption - and save the settings with 'OK,' 'Next,' 'Finish' and 'Close.' Then shut Outlook down.
Encryption Settings in Older versions of Outlook
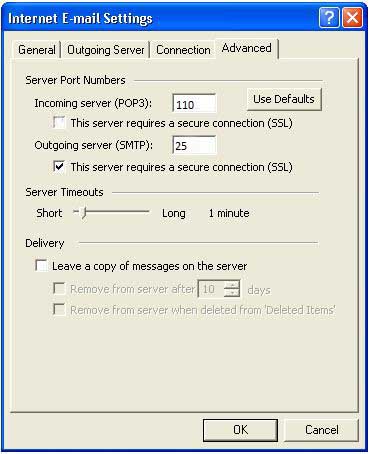
Versions of Microsoft Outlook from 2003 and earlier do not have the multiple-choice dropdown for encryption type; instead they have a single tick-box labelled 'This server requires a secure connection (SSL),' Put a tick in the box, as shown below, and it will work perfectly.
Thats all of the settings done. Now you have to link Outlook to your server's self-issued security certificate.
A Question of Security
What to do about your Security Certificate
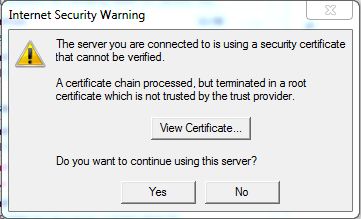
The next time you start Outlook, compose a new email and run 'Send and Receive,' Outlook will ask you whether you are happy to use the server: the dialogue is shown below...
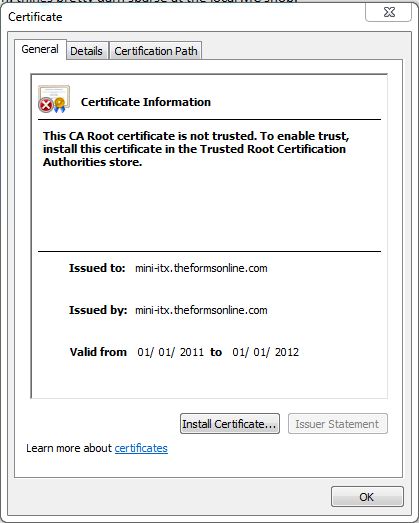
Click 'View Certificate' and a Window like this will appear...
Note that the fully qualified server name appears twice.
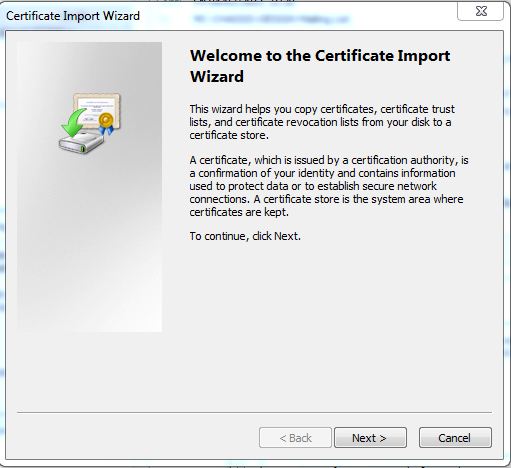
Click 'Install Certificate' to get this dialogue...
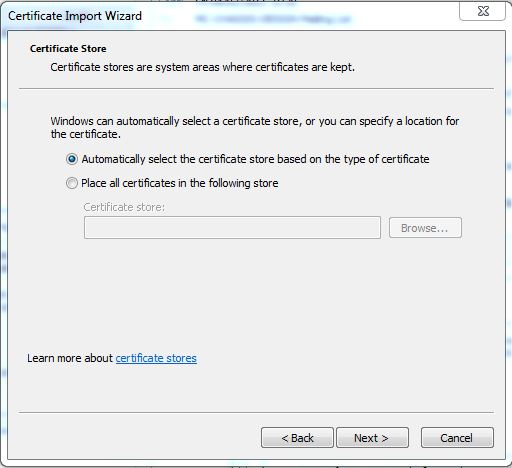
Click 'Next' and you will see...
Don't change any settings. Just click 'Next' - it gives this dialogue...
Click 'Finish' to go to this result...
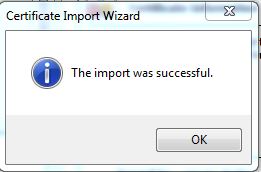
And tell it you want to do it anyway by clicking 'yes,' which will install the certificate and report the result...
At this stage the 'Do you want to use this server' dialogue may have timed out and given you a send-failure notice. Not to worry! Just hit 'Send and receive' again [F9], and say 'Yes' to the 'Do you want to use this server' question.
That's it! Outlook can now authenticate itself to your SME SMTP Server and send emails.
Older versions of Outlook and Certificates
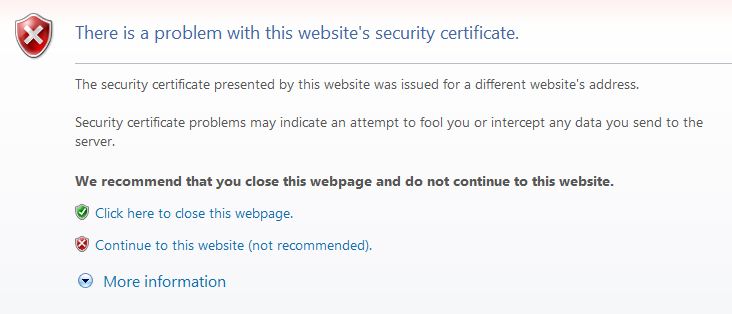
Older versions of Microsoft Outlook - 2003 and earlier - do not have the ability to install certificates, so you will only see a 'Do you want to use this server' query and would have to answer it every time you try to send email after restarting the program. To get round this you need to install the certificate directly into Internet Explorer because it is the certificate routine from IE that is used by Outlook. To do this: open Internet Explorer and type in the URL for your server manager - http://fully_qualified_server_name/server-manager [in my case http://mini-itx.theformsonline.com/server-manager]. This will give a security challenge screen...
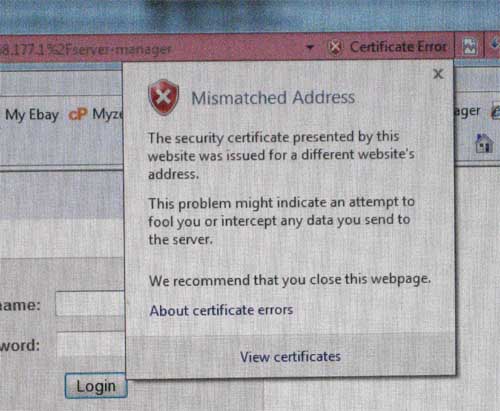
Click 'Continue to this website (not recommended).' and you will reach the Server Manager login screen. The address bar at the top of this window will be pink coloured, with a notice button at the right hand end saying 'Certificate error.'
Click it and you will see a very similar certificate installation routine to the one described in Section 6.1, 'What to do about your Security Certificate,'
above - the dialogues look a little different but they follow exactly the same sequence.
Other Domains
Repeat as required
If you have more than one domain on your server, with accounts set up in Outlook, you will need to change the settings shown in 'Section 5,' 'Things to do in Outlook,' for each of them.
Things to Follow-Up
Self-signed certificates have dates incorporated. Does this mean that the installation of the Security Certificate will need to be repeated annually? If so it's a pain, especially for administrators with a lot of workstations to look after.
Perhaps it would be better for SME Server to switch to Port 587 transmission, which the is the recommended port in the SMTP standards and does not require client installation of certificates in order to function.
