SoftEther VPN
Maintainer
This howto has been developed by Olivier Beeckmans
Sources info are located here : http://www.softether.org/
Compiled from http://forums.contribs.org/index.php/topic,52134.0.html
Description
SoftEther VPN ("SoftEther" means "Software Ethernet") is one of the world's most powerful and easy-to-use multi-protocol VPN software.
It runs on Windows, Linux, Mac, FreeBSD and Solaris. SoftEther VPN is open source. You can use SoftEther for any personal or commercial use for free charge.
SoftEther VPN is an optimum alternative to OpenVPN andMicrosoft's VPN servers.
SoftEther VPN has a clone-function of OpenVPN Server.
You can integrate from OpenVPN to SoftEther VPN smoothly.
SoftEther VPN is faster than OpenVPN. SoftEther VPN also supports Microsoft SSTP VPN for Windows Vista / 7 / 8 / 10.
No more need to pay expensive charges for Windows Server license for Remote-Access VPN function.
SoftEther VPN can be used to realize BYOD (Bring your own device) on your business.
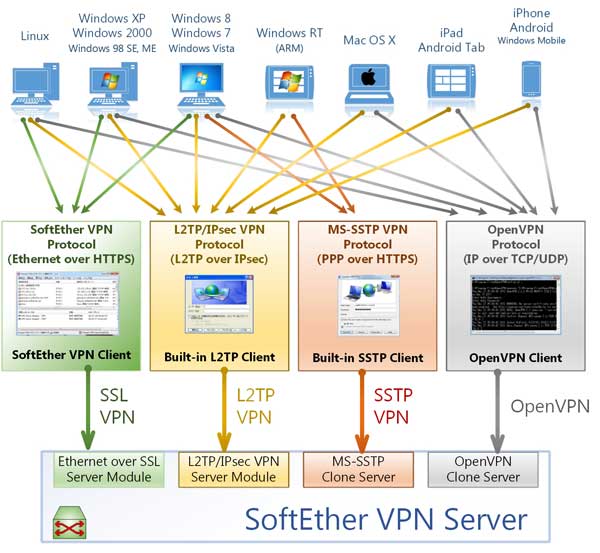
If you have smartphones, tablets or laptop PCs, SoftEther VPN's L2TP/IPsec server function will help you to establish a remote-access VPN from your local network.
SoftEther VPN's L2TP VPN Server has strong compatible withWindows, Mac, iOS and Android.
Processing
Step to install and run SoftEther
Configure Port Forwarding
In SME Server Manager set the following rules under Security -> Port Forwarding:
| Protocol | Source Port(s) | Destination Host IP Address | Destination Port(s) | Allow Hosts | Rule Comment | Action |
| TCP | 1194 | localhost | 1194 | SoftEther OpenVPN | ||
| TCP | 5555 | localhost | 5555 | SoftEther Management | ||
| UDP | 1194 | localhost | 1194 | SoftEther OpenVPN | ||
| UDP | 500 | localhost | 500 | SoftEther SoftEther L2TP/IPSec | ||
| UDP | 1701 | localhost | 1701 | SoftEther SoftEther L2TP/IPSec | ||
| UDP | 4500 | localhost | 4500 | SoftEther SoftEther L2TP/IPSec |
or you can manually add the portforwarding rules:
db portforward_tcp set 1194 forward Comment 'SoftEther OpenVPN' DestHost localhost DestPort 1194 AllowHosts ' ' DenyHosts ' '
db portforward_tcp set 5555 forward Comment 'SoftEther Management' DestHost localhost DestPort 5555 AllowHosts ' ' DenyHosts ' '
db portforward_udp set 1194 forward Comment 'SoftEther OpenVPN' DestHost localhost DestPort 1194 AllowHosts ' ' DenyHosts ' '
db portforward_udp set 500 forward Comment 'SoftEther SoftEther L2TP/IPSec' DestHost localhost DestPort 500 AllowHosts ' ' DenyHosts ' '
db portforward_udp set 1701 forward Comment 'SoftEther SoftEther L2TP/IPSec' DestHost localhost DestPort 1701 AllowHosts ' ' DenyHosts ' '
db portforward_udp set 4500 forward Comment 'SoftEther SoftEther L2TP/IPSec' DestHost localhost DestPort 4500 AllowHosts ' ' DenyHosts ' '
signal-event portforwarding-update
Download, Install and Run SoftEther
Install needed tools
yum install gcc
For SME 9.x 32 Bits
cd /opt
wget http://www.softether-download.com/files/softether/v4.25-9656-rtm-2018.01.15-tree/Linux/SoftEther_VPN_Server/32bit_-_Intel_x86/softether-vpnserver-v4.25-9656-rtm-2018.01.15-linux-x86-32bit.tar.gz
tar zxvf softether-vpnserver-v4.20-9608-rtm-2016.04.17-linux-x86-32bit.tar.gz
cd vpnserver
make # Read and Accept License Agreement, after compile (1 min)
./vpnserver start
For SME 9.x 64 Bits
cd /opt
wget http://www.softether-download.com/files/softether/v4.25-9656-rtm-2018.01.15-tree/Linux/SoftEther_VPN_Server/64bit_-_Intel_x64_or_AMD64/softether-vpnserver-v4.25-9656-rtm-2018.01.15-linux-x64-64bit.tar.gz
tar zxvf softether-vpnserver-v4.20-9608-rtm-2016.04.17-linux-x64-64bit.tar.gz
cd vpnserver
make # Read and Accept License Agreement, after compile (1 min)
./vpnserver start
Remove gcc for security reasons:
yum remove gcc cloog-ppl cpp libgomp mpfr ppl
Finishing Installation On Windows
Download Management Interface
http://www.softether-download.com/files/softether/v4.25-9656-rtm-2018.01.15-tree/Windows/SoftEther_VPN_Server_and_VPN_Bridge/softether-vpnserver_vpnbridge-v4.25-9656-rtm-2018.01.15-windows-x86_x64-intel.exe
For the latest versions of SoftEther components please check http://www.softether-download.com/en.aspx
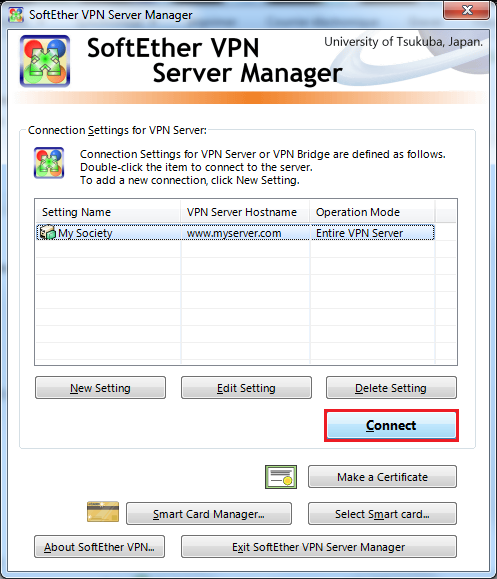
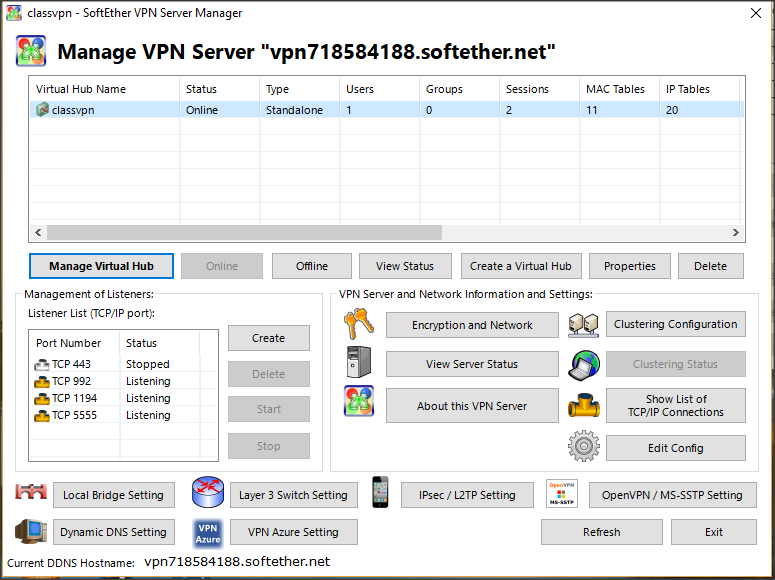
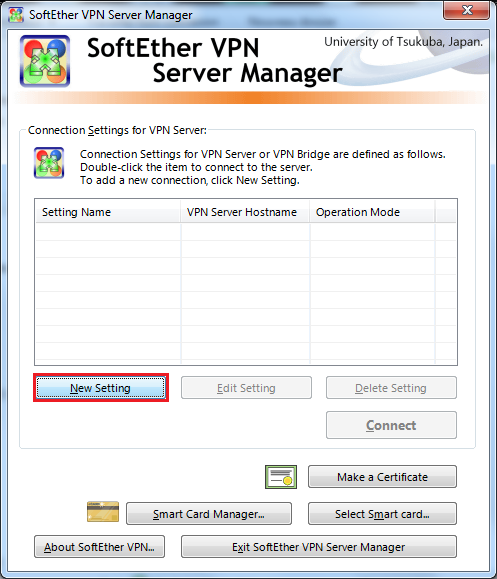
After installation Clic On New Setting
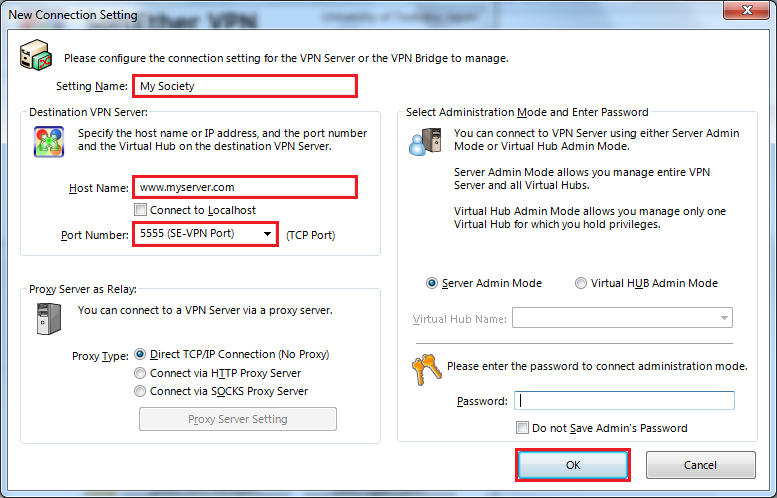
Set Setting Name, Set Host Name, Choose Port Number 5555
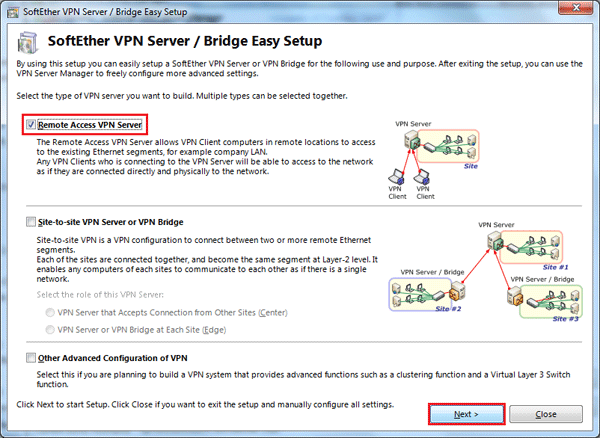
Choose Remote Access VPN Server
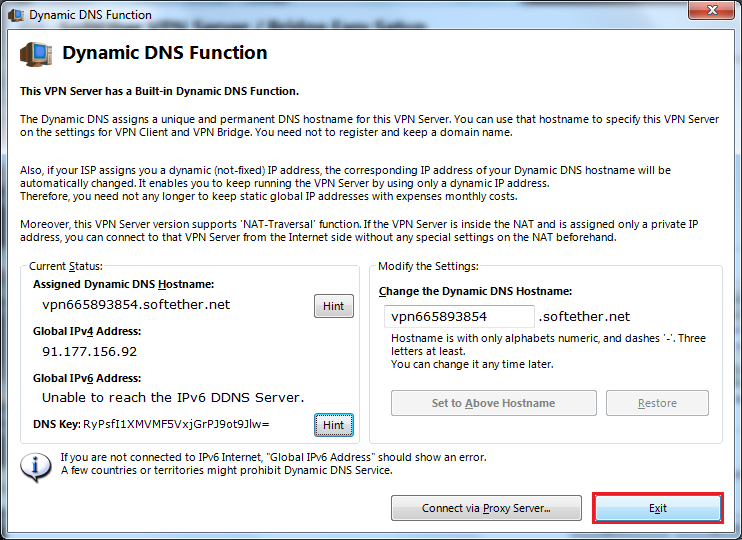
Set Dynamic DNS if Needed (Dynamic IP)
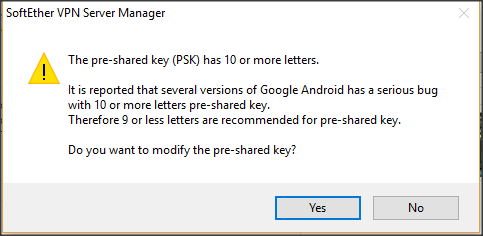
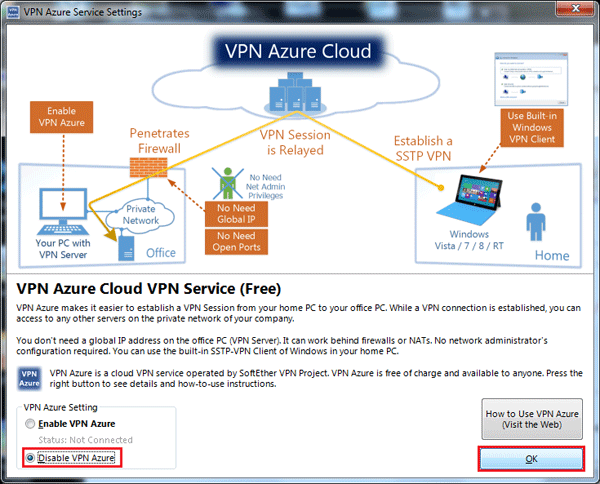
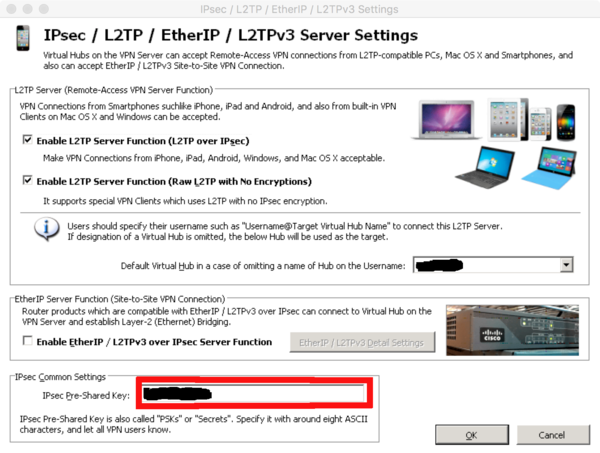
Enable L2TP/IPSec And Create Pre-Shared Key (No More Of 10 Charactere for compatibility with Android)
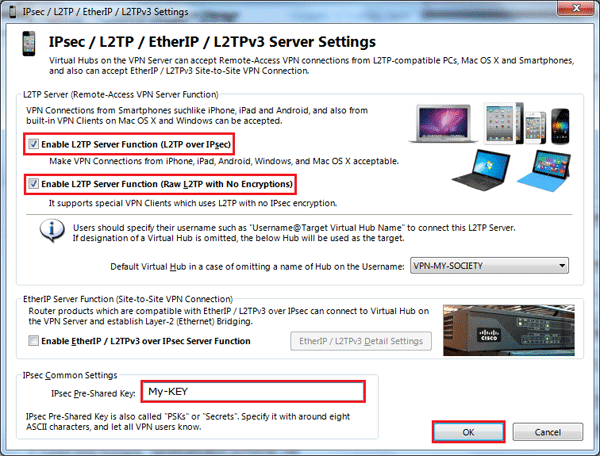
PSK lengths greater than 9 characters ARE able to be entered and saved, See following post from Softether forums and English lang dialog box that is referenced in that post: http://www.vpnusers.com/viewtopic.php?f=7&t=8405 it requires the answering of the following dialog box with No to set a PSK length greater than 9, beware of issues with Android when length is greater than 10
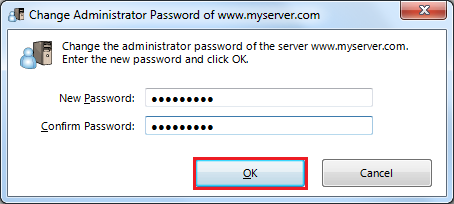
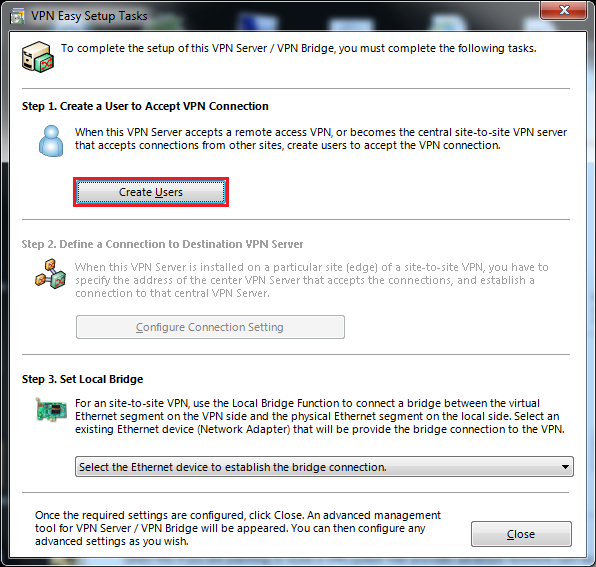
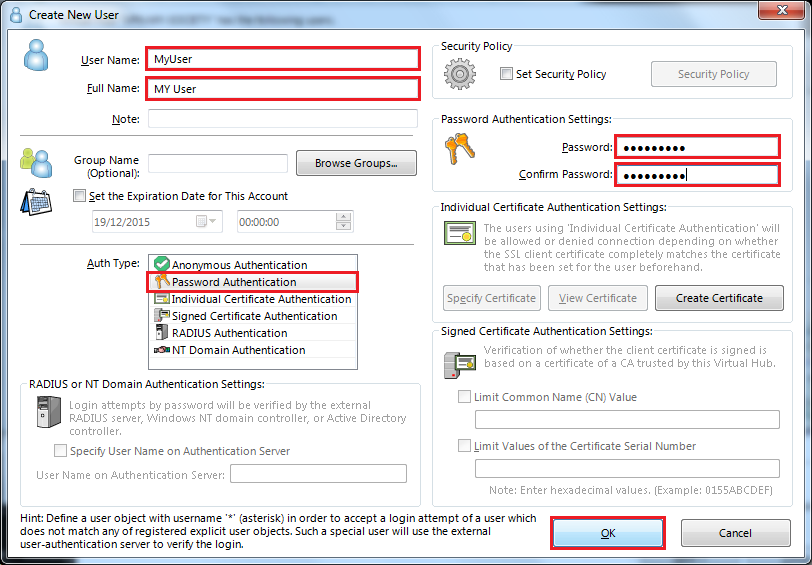
Set User Name, Autentification Method, Password
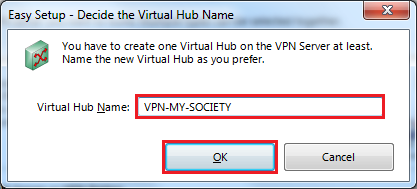
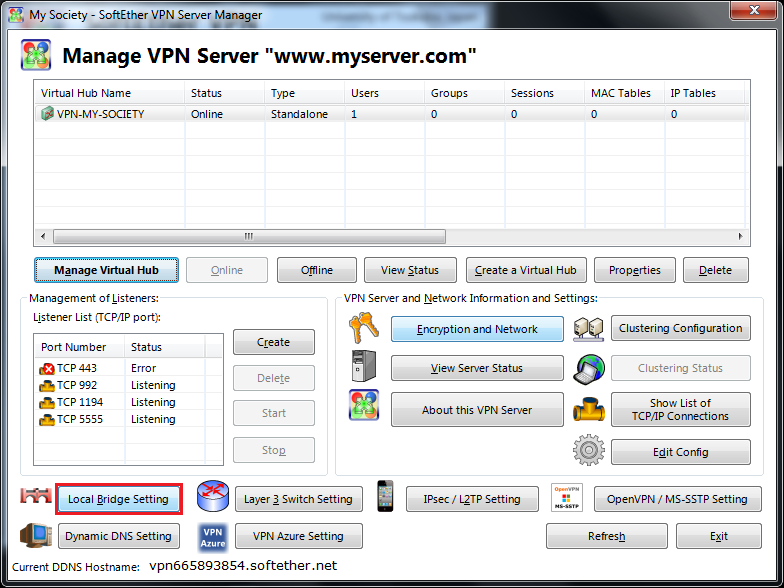
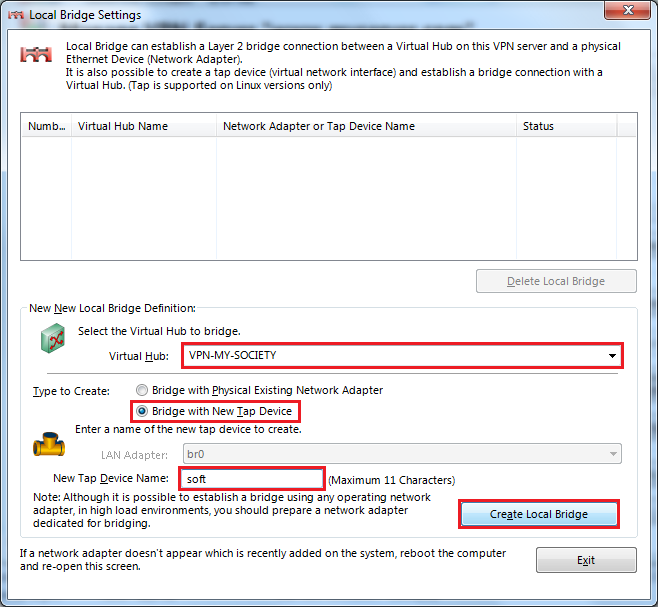
Create Local Bridge
Choose Virtual Hub, Choose Bridge With Tap Device, Set Tap Device Name : soft
Check On SME
# ifconfig
tap_soft  Link encap:Ethernet  HWaddr 00:AC:0D:17:8E:2D
         UP BROADCAST RUNNING MULTICAST  MTU:1500  Metric:1
         RX packets:0 errors:0 dropped:0 overruns:0 frame:0
         TX packets:0 errors:0 dropped:0 overruns:0 carrier:0
         collisions:0 txqueuelen:500
         RX bytes:0 (0.0 b)  TX bytes:0 (0.0 b)
Auto Start SoftEther vpnserver
nano /etc/init.d/vpnserver
#!/bin/sh
#
### BEGIN INIT INFO
# Provides: vpnserver
# Default-Start:
# Default-Stop:
# Should-Start: portreserve
# Required-Start: $network
# Required-Stop:
# Short-Description: Start and stop the vpnserver server
# Description: SoftEther VPN Server.
### END INIT INFO
DAEMON=/opt/vpnserver/vpnserver
LOCK=/var/lock/subsys/vpnserver
test -x $DAEMON || exit 0
case "$1" in
start)
$DAEMON start
touch $LOCK
;;
stop)
$DAEMON stop
rm $LOCK
;;
restart)
$DAEMON stop
sleep 3
$DAEMON start
;;
*)
echo "Usage: $0 {start|stop|restart}"
exit 1
esac
exit 0
Start In Run Level 7
chmod 755 /etc/init.d/vpnserver
ln -s /etc/init.d/vpnserver /etc/rc7.d/S79vpnserver
Download And Install Bridging
More info is required and needs to be explained why the bridging is needed, if at all.
For SME 9.x 32 Bits
rpm -i http://mirror.contribs.org/releases/9.2/smecontribs/i386/RPMS/smeserver-bridge-interface-0.2-1.el6.sme.noarch.rpm --nodeps
signal-event post-upgrade; signal-event reboot
For SME 9.x 64 Bits
rpm -i http://mirror.contribs.org/releases/9.2/smecontribs/x86_64/RPMS/smeserver-bridge-interface-0.2-1.el6.sme.noarch.rpm --nodeps
signal-event post-upgrade; signal-event reboot
Configure Bridging and restart
# config setprop bridge ethernetInterface YOUR_LAN_INTERFACE
# config setprop bridge tapInterface tap_soft
# /etc/init.d/bridge restart
Show bridge config settings
# db configuration show bridge
Check Bridge
# brctl show
bridge name     bridge id               STP enabled     interfaces
br0             8000.00ac0d178e2d       no              em1
                                                        tap_soft
Test With Windows
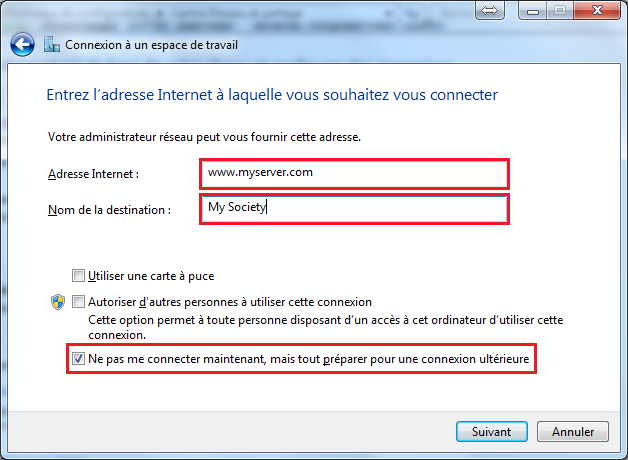
Create VPn Connection
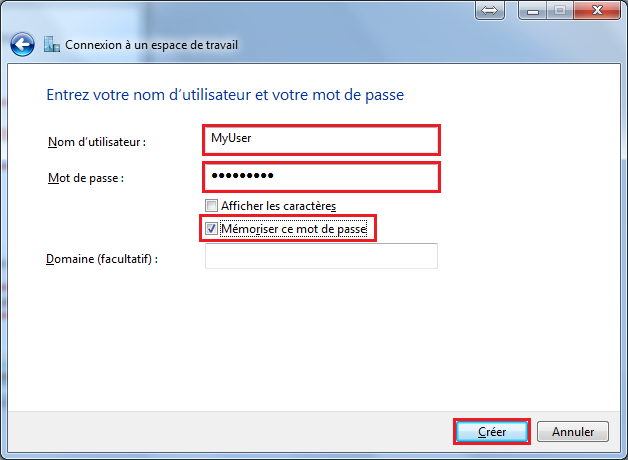
Set Internet Address and Destination Name, clic do not connect now and Next
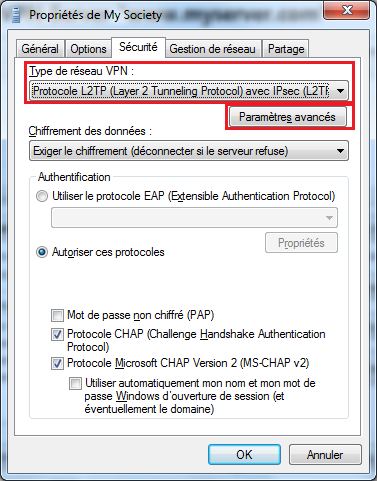
Set Property On Your VPN Connection

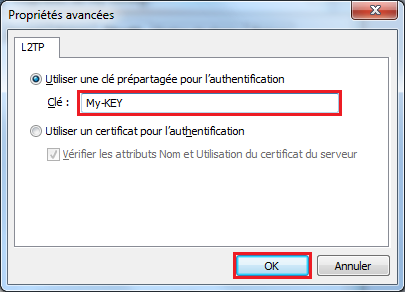
Choose VPN Network Type and clic on Advanced Settings
Make A Connection and Check State
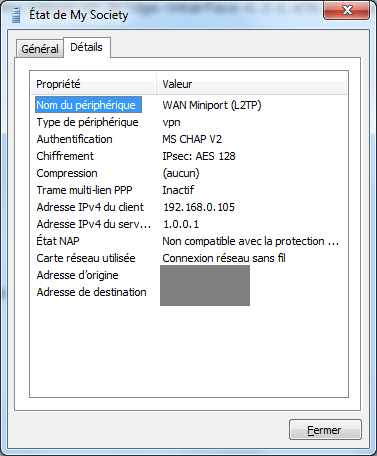
You can now access your samba ressources !
Radius authentication
A custom template fragment is required to force ldap authentication for Radius. Create the template fragment:
mkdir -p /etc/e-smith/templates-custom/etc/raddb/users/
echo "DEFAULT Auth-Type := LDAP" > /etc/e-smith/templates-custom/etc/raddb/users/40ldap
Then we need to expand the template fragments and restart radiusd:
signal-event remoteaccess-update
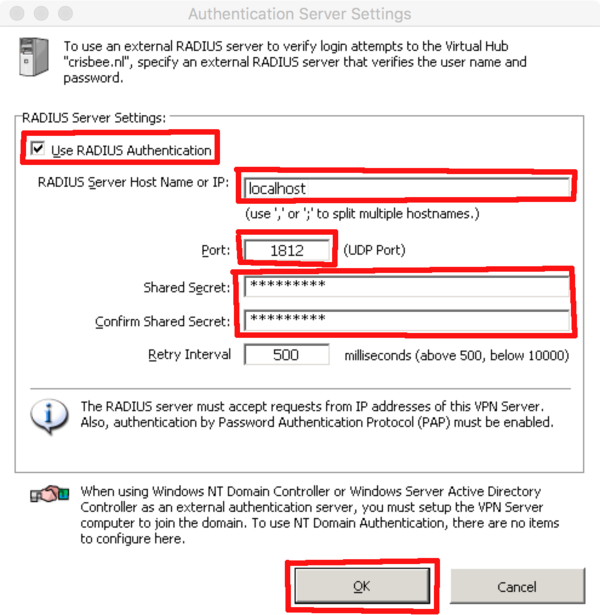
Then one must set the Radius server credentials in the Softether VPN server manager (thus the info of SME Server itself)
host: localhost or 127.0.0.1
UDP port 1812
key: default shared secret that can be found with:
cat /etc/radiusclient-ng/servers
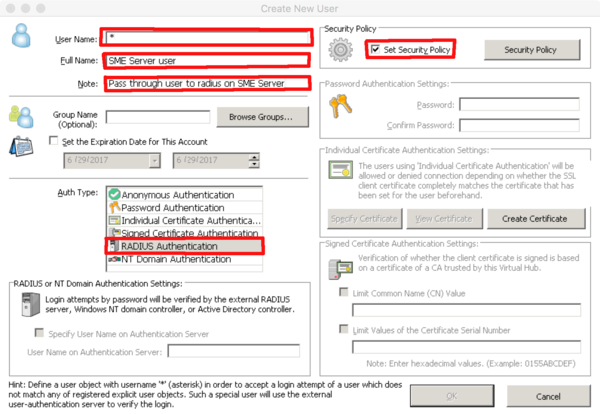
The create a 'passthrough user' with the username of '*', set Auth Type to Radius and enable security policy. The default policy enables allows all SME Server users.
If you previously created SME Server users manually, you can delete these so there is ONLY one user called '*'
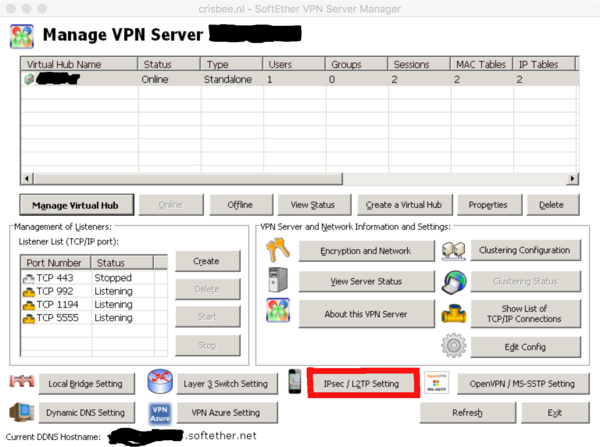
Finally one must set the pre-shared key also in the L2TP settings of the virtualhub
All SME Server users should now be able to create a VPN connection. Since Softether VPN is not 'integrated' yet into the db and templating system, one does not need to enable VPN access on SME Server user accounts. This option in Server Manager will be ignored by Softether VPN. By default when authenticating against the SME Server Radius server all users will be able to create a VPN connection.
If you want to deny VPN access to some SME Server users one must create separate user accounts in VPN manager with the username of SME Server, set authentication to Radius and enable security policy. Then edit the security policy and set it to disabled. The SME Server user is no longer allowed to create a VPN.
Server Only Mode
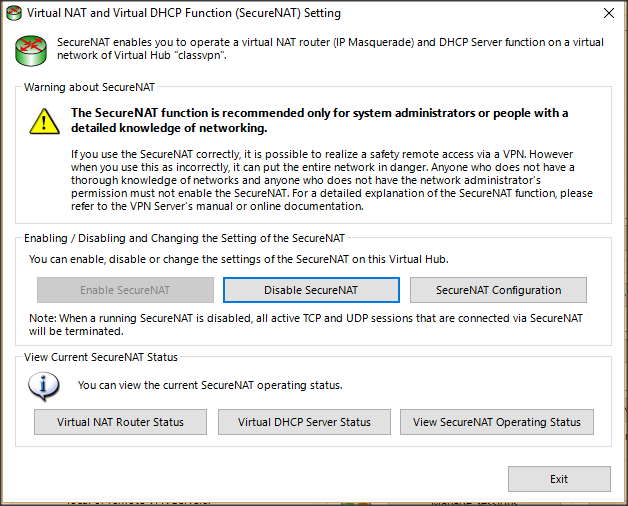
If you have configured your SME server to be in server only mode then it isn't routing traffic in and out of your network. It has been found that with some modem/routers you may need to enable the Virtual DHCP Server functions of Softether so as to access remote lan resources.
From the Softether VPN server manager connect to the relevant VPN server
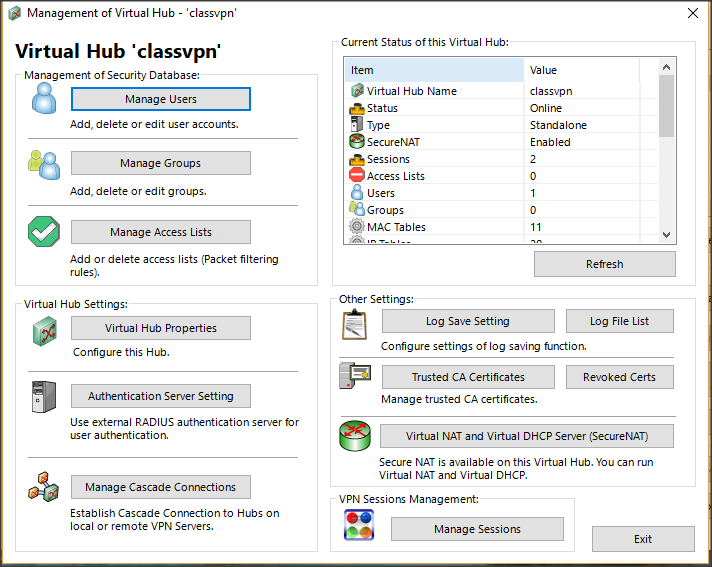
Select Manage selected virtual hub
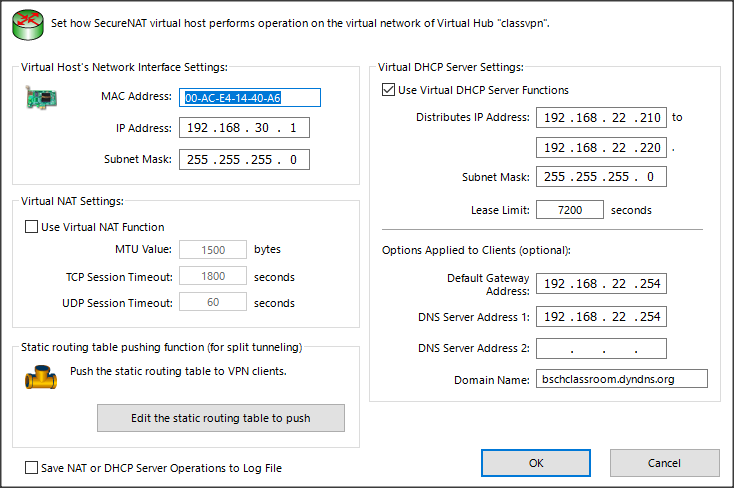
Select Virtual Nat and Virtual DHCP
Select enable secure NAT and then SecureNAT Configuration
In Virtual DHCP Server Settings Set IP range settings as appropriate for the remote lan.
Disable SME Server PPTPD service
After verifying that your new Softether VPN is working, you may disable the default (and insecure) SME Server PPTPD service:
config setprop pptpd status disabled
signal-event remoteaccess-update
Uninstall
To completely remove SoftEther from your SME Server you may run the below commands. You may safely ignore any warning if you did not install some of the components.
service vpnserver stop
rm -f /etc/rc7.d/S79vpnserver
rm -f /etc/init.d/vpnserver
rm -fR /opt/vpnserver
db portforward_tcp delete 1194
db portforward_tcp delete 5555
db portforward_udp delete 1194
db portforward_udp delete 500
db portforward_udp delete 1701
db portforward_udp delete 4500
yum remove smeserver-bridge-interface
db configuration delete bridge
rm -f /etc/e-smith/templates-custom/etc/raddb/clients.conf/10localhost
rm -f /etc/e-smith/templates-custom/etc/radiusclient-ng/servers/10localhost
rm -f /etc/e-smith/templates-custom/etc/raddb/users/40ldap
signal-event post-upgrade; signal-event reboot
Hints and tips
- Using the native MS-SSTP VPN possibility on windows, one must use not just the username but username@virtualhub_name
