SME Server talk:Documentation:Administration Manual:Chapter7/fr
Configuration des ordinateurs de votre réseau
Dans quel ordre faire les choses
Pour plus d'efficacité, nous vous recommandons de configurer vos ordinateurs de bureau dans l'ordre suivant:
Étape 1: Tout d'abord, configurez l'un de vos ordinateurs de bureau pour travailler avec TCP / IP (en utilisant les informations contenues dans ce chapitre).
Étape 2: Avec TCP / IP installé et opérationnel sur un de vos ordinateurs, vous pouvez maintenant accéder au gestionnaire de serveur sur le web et de créer des comptes d'utilisateurs de vos employés. Le chapitre suivant, explique ce processus simple.
Étape 3: Une fois les comptes e-mail sont créés, vous pouvez vous assurer que tous les ordinateurs de votre réseau sont configurés pour TCP / IP, e-mail, navigation web et LDAP en utilisant les informations contenues dans ce chapitre et le Manuel Utilisateur.
Ce chapitre vous aide à configurer les systèmes d'exploitation et le matériel fourni par d'autres fabricants d'ordinateur et, pour cette raison il n'est pas aussi précis que le reste du guide. Compte tenu de la large gamme d'ordinateurs, systèmes d'exploitation et des applications logicielles, nous ne pouvons pas vous expliquer avec précision le processus de configuration de chacun d'eux. Si vos ordinateurs et leurs applications sont venus avec leurs manuels, ils sont des compléments indispensables à ce chapitre (RTFM). Les problèmes techniques rencontrés dans la mise en réseau de vos ordinateurs de bureau et vos applications seront mieux résolus si vous rentrez en contact avec les personnes qui vous ont vendu votre système informatique.
Configurer votre système d'exploitation
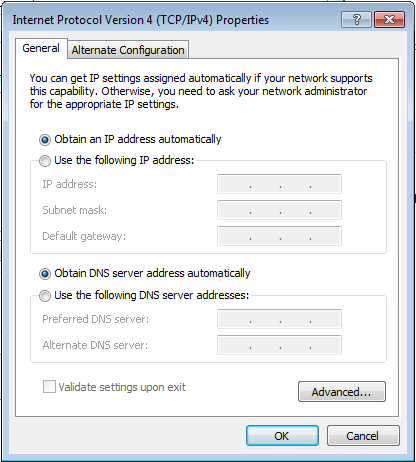
La boîte de dialogue qui vous permet de configurer votre bureau diffère du type de système d'exploitation et de sa version. Par exemple, dans Microsoft Windows Seven, la configuration du client se fait dans la boîte de dialogue "Propriétés" associé au protocole TCP / IP de votre adaptateur Ethernet. Si le protocole TCP / IP n'est pas encore associé à votre adaptateur ethernet, c'est probablement du à un problème de driver ou à une carte réseau mal reconnue, vous allez devoir résoudre ces problèmes avant de pouvoir configurer ses propriétés avec les informations suivantes.
| Item | Description | What to enter |
|---|---|---|
| Ce qu'il faut saisir | Tous vos ordinateurs doivent communiquer sur le réseau en utilisant le protocole TCP / IP. | Sous Windows, vous ajoutez un protocole TCP / IP. Dans Apple, ouvrir TCP / Panneau de configuration IP. |
| désactiver les protocoles non-TCP/IP | Sauf si une application s'appuie sur un protocole non TCP / IP, désactivez tous les autres protocoles. | Tourner tous les autres protocoles réseau à «OFF» (par exemple NetBeui, etc) |
| activer le service DHCP | Voir la section ci-dessous | Dans Windows, activez l'option "Obtenir un service d'adresse IP automatiquement». Dans Apple, sélectionnez "serveur DHCP". |
Sur un système Windows Seven, la page de configuration ressemblera à l'image ci-dessous.
Attribution IP automatique par DHCP
Votre serveur fournit un serveur DHCP qui attribue à chacun des ordinateurs de votre réseau une adresse IP, un masque de sous-réseau, l'adresse IP de la passerelle et l'adresse IP du ou des DNS. Pour une explication plus détaillée du DHCP, consultez l'article du Chapitre 5 appelée «Configuration de votre serveur DHCP».
Paramétrage manuel des ordinateurs n'utilisant pas le service DHCP
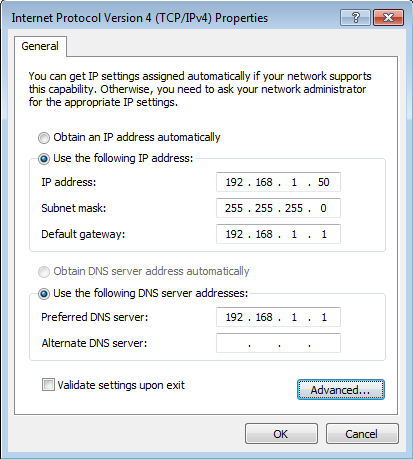
As noted above, we strongly recommend that you perform all your client configuration using DHCP. It is even possible to assign a static IP address through the Hostnames and addresses web panel of the server manager that will be distributed through your DHCP server. However, if your computers do not support DHCP, you must manually enter the following information into your TCP/IP properties:
| Item | Description | What to enter |
|---|---|---|
| IP address | Manually enter this information (see paragraph below). | You must assign a different, unique IP address to computers not accepting DHCP (see note below). |
| subnet mask (or netmask) | Manually enter this number. | The default subnet mask (or netmask) is "255.255.255.0". |
| gateway IP address | Enter the IP address for the server or, in the case of server-only mode, enter the IP address for your network's gateway (e.g. the firewall or network router). | If you are running in server and gateway mode, your server is your local network's gateway. Enter its IP address here: the default is "192.168.1.1". If you are running in server-only mode, enter the IP address for the device interfacing with your external network(i.e the box of your Internet Service Provider for example). |
| IP addresses of your domain name servers | Manually enter this information. | Normally you would just add the IP address for your server - the default used in the server console is "192.168.1.1". If you have a firewall other than your server that restricts internal queries to Internet DNS servers, you may need to enter additional DNS servers here. |
It is critical that every computer on your network has a unique IP address and that you don't assign two computers the same address. In enabling DHCP service in the server console, you designated a range of IP addresses for DHCP assignment. You also allocated a block of IP addresses for manual assignment. If you accepted the defaults pre-configured into the server console, IP addresses 192.168.1.2 through 192.168.1.64 will have been set aside for manual entry. To avoid duplication, use only those IP addresses when manually assigning IP addresses to your computers.
After configuring the TCP/IP parameters, you may need to reboot your desktop computer to implement the configuration changes. (For example, most Windows systems need to be rebooted after the TCP/IP configuration has been changed.) Once the settings take effect, your computer will be connected to the server and to the Internet.
MS Windows workgroup configuration
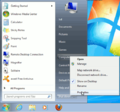
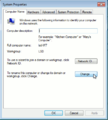
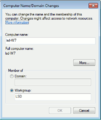
If you are using a Microsoft operating system, you must ensure that your workgroup is the same as the workgroup name of your server. (In a subsequent chapter, we'll explain how this can be set using the web-based server manager.) Go to the "start menu", right click on computer, select "Properties", select the link "change Settings", then click on "Change" Tab. In the field for "Workgroup", type your "workgroup".
MS Windows Domain configuration
SME Server can be configured to be the "Workgroup and Domain Controller" for your network, here users do not need accounts on individual PC's but authenticate against the Server. (In a subsequent chapter, we'll explain how this can be set using the web-based server manager.)
See bugzilla:7172 re registery entries to facilitate the joining of Windows 7 and Windows 8 PCs to a SME Server "Workgroup and Domain Controller" also forum entry http://forums.contribs.org/index.php/topic,49229.0.html for further info.
Connecting to a Domain
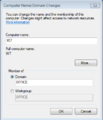
To connect a windows Seven client to your domain, Go to the "start menu", right click on computer, select "Properties", select the link "change Settings", then click on "Change" Tab.. Enter your servers "workgroup" value in the domain field and 'Connect'. Enter the username of admin(*) with the servers admin password when asked, and you should get back the response 'Connected to workgroup'.
(*) Admin or any user in the 'Domain Admins' group can join the domain.
Setting up network drives
If you are using SME Server as a domain controller and the workstations have joined the domain you can automate drive mapping and syncronise the PC time with the netlogon.bat file
Note: Chapter 13 has a method for admin to edit the netlogon.bat file without using the command line.
nano -w /home/e-smith/files/samba/netlogon/netlogon.bat
REM To set the time when clients logon to the domain:
net time \\servername /set /yes
REM To map a home directory to drive h:
net use h: /home /persistent:no
net use j: \\servername\ibay1 /persistent:no
net use p: \\servername\ibay2 /persistent:no
if exist Z: net use Z: /del /yes
and reset file to dos format
unix2dos /home/e-smith/files/samba/netlogon/netlogon.bat


