Backup of ESXi Virtual Machines using Affa
Introduction
As of version 2, Affa supports hot backing up virtual machines running on the VMWare ESXi server. It uses the VMware Infrastructure Perl Toolkit to communicate with the EXSi and rsync over ssh to transfer the data. Before the backup starts, the state of the running VM is freezed by creating a snapshot of all its disks. After the freezed virtual disk files were backed up, the snapshot is deleted and the config points to the just backed up disks again. Then, as a last step the config files are backed up.
A restore of a VM can be done by simply copying back all archived files to the original location on the ESXi host. It is also possible to copy the files to a different directory (or to another ESXi server) and add the vmx file to the inventory.
Latest Affa version is smeserver-affa-2.0.0-beta18
Preparing the Affa Server
VMware Infrastructure (VI) Perl Toolkit
Configure the DAG repository
The following command will configure the dag repository on SME Server. EDIT NOT COMPLETE!
To create an entry in the database for the epel repository we open put the following commands in a terminal
window or in a shell window:
/sbin/e-smith/db yum_repositories set epel repository \
Name 'SME Server - epel' \
BaseURL 'http://<http://download.fedoraproject.org/pub/epel/7/$basearch' \
EnableGroups yes \
GPGCheck yes \
Visible no \
status disabled
To enable the changes:
signal-event yum-modify
Just to be sure, give yum a fresh start:
yum clean all
After adding it to the database we have to update the changes to the configuration file:
signal-event yum-modify
Login as root and run:
/usr/bin/yum install openssl-devel
/usr/bin/yum --enable=dag install perl-XML-SAX
Install the VMware Infrastructure (VI) Perl Toolkit
Download the VI Perl Toolkit tarball from the VMWare web site: http://www.vmware.com/support/developer/viperltoolkit/
tar xzf VMware-VIPerl-1.6.0-104313.i386.tar.gz
cd vmware-viperl-distrib
Edit the vmware-install.pl script and comment out these lines
  4738 #      if ( -d '/proc/xen' ) {
  4739 #        error('You cannot install ' .
  4740 #              vmware_product_name() .
  4741 #              ' on a system running a xen kernel.');
  4742 #      }
Run the script
./vmware-install.pl
Ignore this warning: The following Perl modules were found on the system but may be too old to work with VIPerl: URI XML::NamespaceSupport
Install Affa Version 2 beta
Install the latest Affa 2.x beta version. Download the RPM from http://mirror.contribs.org/smeserver/contribs/michaelw/sme7/Affa2
/usr/bin/yum --enable=dag localinstall smeserver-affa-2.0.0-beta*.noarch.rpm
Preparing the ESXi Host for use with Affa
To make the ESXi server ready to cooperate with Affa you must install the rsync program, enable the ssh service, configure passwordless ssh login and add a user for communication using the VMware Infrastructure (VI) Perl Toolkit.
Adding an ESXi User with restricted Permissions
Run the Virtual Infrastructure Client and logon to the ESXi host.
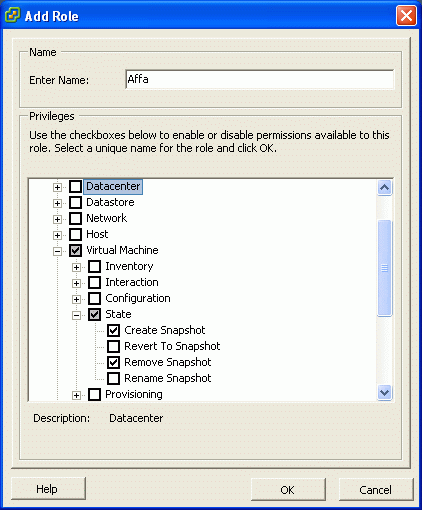
Adding Affa role
Switch to the Administration module and add a new role with permissions to create and delete snapshots
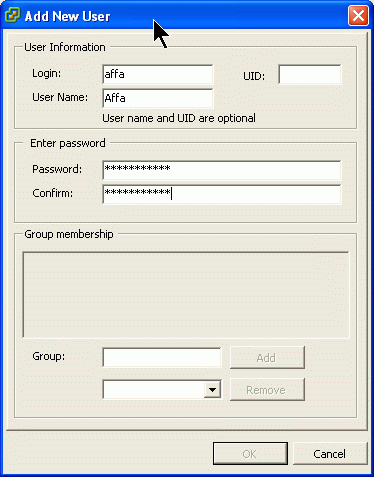
Adding Affa user
Switch back to the Inventory module and add a new user with password:
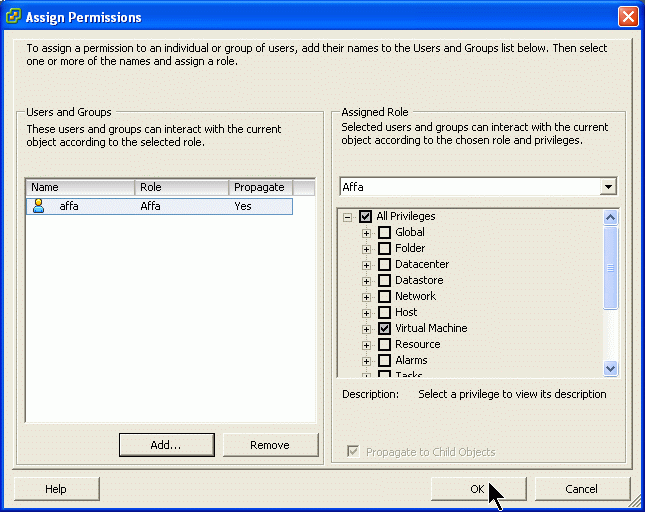
Assigning permissions
In the Permission Tab assign the new role to the new user.
Configuring SSH and RSYNC on the ESX3i Host
On ESXi the SSH service Dropbear is installed but disabled. To use rsync the SSH service must be enabled and the rsync program must be installed. To enable passwordless login a .ssh directory for storing the keys must be created.
A script affa-setup.sh is provided that does this:
- enable SSH service by configuring inetd.conf and restarting the inetd service
- install rsync (statically linked binary)
- create a /root home directory with a .ssh sub directory to store the public keys for password-less login
- link the .ssh directory to the non-volatile USB device
- add a command to /etc/rc.local that executes all the steps above at boot time
Download and install the script
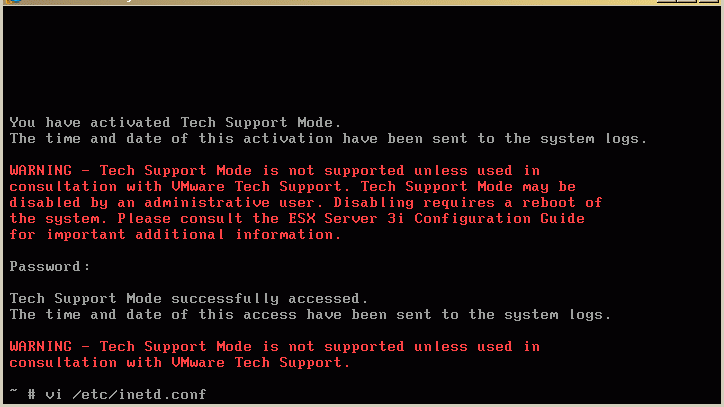
On the ESXi Server console hit Alt-F1 to get the service shell. Now blind-type the word unsupported to unlock the shell.
Login with the root password.
Download the tarball. The tarball contains the rsync binary and the script.
cd /bootbank
wget http://mirror.contribs.org/smeserver/contribs/michaelw/sme7/Affa2/affa-esxi-setup-02.tgz
Verify the download
 wget http://mirror.contribs.org/smeserver/contribs/michaelw/sme7/Affa2/affa-esxi-setup-02.tgz.md5sum
 md5sum -c affa-esxi-setup-02.tgz.md5sum
Unpack it
tar xzf affa-esxi-setup-02.tgz
rm affa-esxi-setup-02.tgz*
and run the script
./bexi/affa-setup.sh
Now you can ssh login and use rsync.
Setting up an Affa job
The following assumes, that you are already familiar with configuring Affa and only focus on the ESXi specific parts.
Assume you want to backup the virtual machine named 'myvm' on ESXi server with IP 10.200.48.5.
1. log into the 'affabox' and copy the config helper script
cp -a /usr/lib/affa/jobconfig-esxi-sample.pl /root/esxi-myvm-job.pl
2. edit /root/esxi-myvm-job.pl and set
my $jobname='esxi-myvm';
and
'remoteHostName‘=>'10.200.48.5',
3. tell Affa that this job backups a ESXi virtual machine
'ESXi' => 'yes',
4. set the VM name
'ESXiVMName' => 'myvm',
5. set the username and password (this is the ESXi User with restricted permissions created above)
'ESXiUsername' => 'affa',
'ESXiPassword' => 'secret',
6. configure virtual disk files to be compressed and chunked
'chunkFiles' => '*.vmdk',
7. save the script, then run it
/root/esxi-myvm-job.pl
8. send the public key
affa --send-key esxi-myvm
9. run the job manually
affa --run esxi-myvm
When the Affa job starts, you can watch the snapshot create task in the Virtual Infrastructure Client.

The name of the snaphot starts with "BEXI-". Do not delete it or revert to it while Affa is running.
Uninstall
SSH login as root on the ESXi host and run these commands carefully:
grep -v "#BEXI" < /etc/rc.local >/etc/rc.local.affa; mv -f /etc/rc.local.affa /etc/rc.local
sed -e 's#^\(root:.*\)\(:/root:\)\(.*\)#\1:/:\3#' < /etc/passwd > /etc/passwd.affa; mv -f /etc/passwd.affa /etc/passwd
sed -e 's/^\(ssh.*\)/#\1/' < /etc/inetd.conf > /etc/inetd.conf.affa; mv -f /etc/inetd.conf.affa /etc/inetd.conf
kill -HUP `ps | grep inetd | sed -e 's/ .*//'`
rm -rf /bin/rsync /root /bootbank/bexi
tar -C / -xzf /bootbank/environ.tgz sbin/dropbearmulti
Addtional Information
New properties in Affa 2
| Property | Value | Default | Description |
| ESXi | yes or no | no | enable VMware ESXi virtual machine backup mode |
| ESXiVMName | string | The name of the VM as displayed in the VI Client | |
| ESXiUsername | string | The name of the VI client with permission to created an delete snapshots | |
| ESXiPassword | string | The password of the user ESXiUsername | |
| chunkFiles | string | Filenames that Affa should chunk and compress. Multiple file names are to be separated by the slash (/) character, e.g. 'mysql.dump/pgsql.dump' chunks the two files mysql.dump and pgsql.dump. With ESXi=yes it is implicitly set to '*.vmdk' | |
| SambaShare | yes or no | yes | Access to the job archives via SMB |
| rsyncOptions | string | addtional option string to be passed to rsync |
New command line options in Affa 2
affa --unchunk-archive JOB ARCHIVE
Concatenate and uncompress all chunked files in the archive ARCHIVE of job JOB to make the archive ready for a restore. Note that the most recent archive scheduled.0 is never chunked and therfore can be restored as it is without previous unchunking.
affa --chunk-archive JOB ARCHIVE
Chunk and compress all files that match the names in property chunkFiles to save disk space. The should only be used as the reversal of --unchunk-archive. Chunks are stored as bzip2 files in a directory named FILENAME.affa-chunks with 8 levels depth.
affa --disk-usage
Shows the current disk usage of all root dir filesystems
How to update the ESXi System Image
Shutdown the ESXi server. Remove the USB Memory stick and plug it into a linux computer. run the dmesg command to find out the device the memory stick is assigned to. The following example assumes that it is /dev/sdf. Replace is by the correct device.
mkdir -p /mnt/esxi
mount -t vfat /dev/sdf5 /mnt/esxi
Save local.tgz and the bexi/ directory to the local machine
cp -a /mnt/esxi/local.tgz /mnt/esxi/bexi .
umount /mnt/esxi
Download the ISO from the VMWare website and extract the image.
mount -o loop VMware-VMvisor-InstallerCD*iso /mnt/esxi/
mkdir -p /tmp/esxi
tar -xvzf /mnt/esxi/install.tgz -C /tmp/esxi/
umount /mnt/esxi
cd /tmp/esxi/usr/lib/vmware/installer/
bzip2 -d VMware-VMvisor-big*.dd.bz2
Write the new image to the memory stick. Make sure that you use the correct target device of=...
dd if=VMware-VMvisor-big-3.5.0_Update_3-123629.i386.dd of=/dev/sdf
rm -rf /tmp/esxi
Copy local.tgz and the bexi/ directory to the memory stick.
mount -t vfat /dev/sdf5 /mnt/esxi
cp -a local.tgz bexi /mnt/esxi
umount /mnt/esxi
Plug the memory stick into the ESXi server and power on.
Note: Alternatively you can install the new ESXi image on a second memory stick and then remote copy local.tgz and bexi/ from the running ESXi. Then shut down the ESXi server, replace the stick and power on. This minimizes the down time.
How to make a statically linked Rsync Binary
1. download the source from http://rsync.samba.org/
2. unpack the tarball
tar xzf rsync-3.0.4.tar.gz
cd rsync-3.0.4
3. build the statically linked binary
make CFLAGS="-static" EXEEXT="-static"
strip rsync-static
References
Wiki article Affa


