Difference between revisions of "Windows 10 Support"
(Adding a Microsoft account to you domain account) |
|||
| Line 31: | Line 31: | ||
===Adding a Microsoft account to your domain account=== | ===Adding a Microsoft account to your domain account=== | ||
| − | {{Note box|When you are using Windows 10 in a SME Server domain environment you will normally login with your domain account to be able to use network shares without entering your credentials. You can still login with a local account by using the 'Other user' option and entering the computer name as the domain in the Username box, like this: <ComputerName>\<LocalUsername>}} | + | {{Note box|When you are using Windows 10 in a SME Server domain environment you will normally login with your domain account to be able to use network shares without entering your credentials. You can still login with a local account by using the 'Other user' option and entering the computer name as the domain in the Username box, like this:<tt> <ComputerName>\<LocalUsername></tt>}} |
If you want to be automatically signed into Microsoft's Cloud services (like you would when you login to Windows 10 with a Microsoft Account) you can add your Microsoft Account to your Domain account: | If you want to be automatically signed into Microsoft's Cloud services (like you would when you login to Windows 10 with a Microsoft Account) you can add your Microsoft Account to your Domain account: | ||
* Go to: <tt>Start > Settings > Accounts > Your account</tt> | * Go to: <tt>Start > Settings > Accounts > Your account</tt> | ||
| − | * Scroll down to the section: 'Other accounts you use' | + | * Scroll down to the section: '<tt>Other accounts you use</tt>' |
| − | * Click on the 'Add a Microsoft account' link and supply your credentials | + | * Click on the '<tt>Add a Microsoft account</tt>' link and supply your credentials |
| − | |||
===Setting up network drives=== | ===Setting up network drives=== | ||
Revision as of 19:38, 30 September 2015
Author
Flep based on windows_7_support of David Harper
Background
Windows 10 was released in July 2015. Due to changes in the way that trust relationships are established with domain controllers, some modifications to the windows registry needs to take place.
Join a Window 10 client to SME Server 8 or 9
Previously you needed to edit your Win10 registry to facilitate the joining of a SME Server Domain, however this can more easily be achieved by importing win7samba.reg fix by using either a usb key or by the network with http.
- Save the Win10 registry patch (win10samba.reg) from https://your-server-ip/server-resources/regedit/ with your favourite web browser
- On your windows desktop, start "regedit" from the start menu and import the win7samba.reg
- Set your domain instead of your workgroup. Add the client machine to the domain as normal.
- When asked on your Windows PC use the 'admin' username and your SME Server admins password.
- You have to reboot your computer to reach the domain
(*) Admin or any user in the 'Domain Admins' group can join the domain.
Adding a Microsoft account to your domain account
If you want to be automatically signed into Microsoft's Cloud services (like you would when you login to Windows 10 with a Microsoft Account) you can add your Microsoft Account to your Domain account:
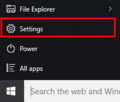
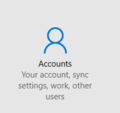
- Go to: Start > Settings > Accounts > Your account
- Scroll down to the section: 'Other accounts you use'
- Click on the 'Add a Microsoft account' link and supply your credentials
Setting up network drives
If you are using SME Server as a domain controller and the workstations have joined the domain you can automate drive mapping and syncronise the PC time with the netlogon.bat file
Note: Chapter 13 has a method for admin to edit the netlogon.bat file without using the command line. You can consider also the chapter 7 on Configuring the Computers on Your Network
nano -w /home/e-smith/files/samba/netlogon/netlogon.bat
REM To set the time when clients logon to the domain:
net time \\servername /set /yes
REM To map a home directory to drive h:
net use h: /home /persistent:no
net use j: \\servername\ibay1 /persistent:no
net use p: \\servername\ibay2 /persistent:no
if exist Z: net use Z: /del /yes
and reset file to dos format
unix2dos /home/e-smith/files/samba/netlogon/netlogon.bat


