Difference between revisions of "Openfire"
m (Removed hashes in front of shell commands) |
(→Visit admin web page to complete Openfire configuration: Add LDAP authentication configuration) |
||
| (12 intermediate revisions by 5 users not shown) | |||
| Line 1: | Line 1: | ||
===Description=== | ===Description=== | ||
| − | Openfire (formerly Wildfire) is a real time collaboration (RTC) server dual-licensed under the Open Source GPL and commercially. It uses the only widely adopted open protocol for instant messaging, XMPP (also called Jabber). Openfire is | + | Openfire (formerly Wildfire) is a real time collaboration (RTC) server dual-licensed under the Open Source GPL and commercially. It uses the only widely adopted open protocol for instant messaging, XMPP (also called Jabber). Openfire is easy to setup and administer, but offers rock-solid security and performance. |
| − | == | + | == Prerequisite for SME 9.x == |
| − | + | The Java Runtime Environment included in the Openfire RPM requires that an additional library be installed 64-bit versions of SME 9.0. To install it, run | |
| − | + | # yum install glibc.i686 | |
| − | |||
| − | |||
| − | |||
| − | |||
== Download and install Openfire == | == Download and install Openfire == | ||
| − | + | You can find the latest version of Openfire at http://www.igniterealtime.org/downloads/index.jsp. Download the RPM to your SME server, then run | |
| − | yum | + | # yum install openfire-*.rpm |
== Create the Database == | == Create the Database == | ||
| Line 20: | Line 16: | ||
To create the Openfire Database, you'll need to perform each of the following steps: | To create the Openfire Database, you'll need to perform each of the following steps: | ||
| − | mysqladmin create openfiredb | + | # mysqladmin create openfiredb |
| − | mysql -e "grant all privileges on openfiredb.* to openfireuser@localhost identified by 'yourpassword'" | + | # mysql -e "grant all privileges on openfiredb.* to openfireuser@localhost identified by 'yourpassword'" |
| − | mysql -e "flush privileges" | + | # mysql -e "flush privileges" |
| − | |||
| − | |||
{{Warning box|You may wish to alter the "openfireuser" and "yourpassword" information in the grant privileges line above. Be sure to remember to remember what you used as the web manager will ask you for it!}} | {{Warning box|You may wish to alter the "openfireuser" and "yourpassword" information in the grant privileges line above. Be sure to remember to remember what you used as the web manager will ask you for it!}} | ||
| + | |||
| + | Edit the database schema (this change does not seem to be necessary with SME 9.0 and Openfire 3.9.3): | ||
| + | |||
| + | # cd /opt/openfire/resources/database | ||
| + | # nano openfire_mysql.sql | ||
| + | |||
| + | At line 57 starts: | ||
| + | |||
| + | CREATE TABLE ofRoster ( | ||
| + | rosterID BIGINT NOT NULL, | ||
| + | username VARCHAR(64) NOT NULL, | ||
| + | jid VARCHAR(1024) NOT NULL, | ||
| + | |||
| + | Change the jid line from 1024 to 255 as shown: | ||
| + | |||
| + | jid VARCHAR(255) NOT NULL, | ||
| + | |||
| + | Import the revised database schema: | ||
| + | |||
| + | # mysql openfiredb < openfire_mysql.sql | ||
== Access MySQL from the local network == | == Access MySQL from the local network == | ||
| Line 66: | Line 80: | ||
[[Image:Openfire 4.jpg]] | [[Image:Openfire 4.jpg]] | ||
| + | |||
| + | == LDAP Authentication == | ||
| + | Openfire can be configured to authenticate users through your SME Server's OpenLDAP server. This will allow you to use a single user and password source, rather than needing to maintain two or more separate databases. This is recommended unless you have a particular reason to want a separate user list for your Openfire installation. To begin, on the Profile Settings screen, select '''Directory Server (LDAP)''': | ||
| + | |||
| + | [[Image:Openfire_ldap_1.png]] | ||
| + | |||
| + | Fill in the Connection Settings screen as shown below, replacing '''yourdomain''' and '''tld''' with your primary domain name and top-level domain, as appropriate. For example, if your domain were example.com, you'd enter '''dc=example,dc=com'''. For the password field, enter your admin user's password. | ||
| + | |||
| + | [[Image:Openfire_ldap_2.png]] | ||
| + | |||
| + | Click '''Test Settings''' to make sure you're able to connect. Then click '''Save & Continue'''. | ||
| + | |||
| + | On the User Mapping page, just scroll to the bottom and click '''Save & Continue'''. | ||
| + | |||
| + | [[Image:Openfire_ldap_3.png]] | ||
| + | |||
| + | Similarly, on the Group Mapping page, click '''Save & Continue'''. | ||
| + | |||
| + | [[Image:Openfire_ldap_4.png]] | ||
| + | |||
| + | On the Administrator Account screen, enter '''admin''' and click '''Add'''. | ||
| + | |||
| + | [[Image:Openfire_ldap_5.png]] | ||
| + | |||
| + | On the next page, your admin account will be listed. Click the Test button to confirm that it will authenticate this account. | ||
| + | |||
| + | [[Image:Openfire_ldap_6.png]] | ||
| + | |||
| + | You should see the Success page below. If you do, you can close it. You can optionally add other administrator users on this page. | ||
| + | |||
| + | [[Image:Openfire_ldap_7.png]] | ||
== SME Server specific configuration == | == SME Server specific configuration == | ||
| Line 87: | Line 132: | ||
Create and edit a file called "99openfire" | Create and edit a file called "99openfire" | ||
| − | + | nano -w 99openfire | |
(add the code shown below to the template) | (add the code shown below to the template) | ||
| Line 94: | Line 139: | ||
# Openfire instant messaging server | # Openfire instant messaging server | ||
| − | Alias / | + | Alias /openfiredocs /opt/openfire/documentation/docs |
| − | <Directory /opt/openfire> | + | <Directory /opt/openfire/documentation/docs> |
AddType application/x-httpd-php .php .php3 .phtml | AddType application/x-httpd-php .php .php3 .phtml | ||
Options Indexes +Includes FollowSymLinks | Options Indexes +Includes FollowSymLinks | ||
| Line 116: | Line 161: | ||
access your documentation at: | access your documentation at: | ||
| − | http://yourservername-or-IP/ | + | http://yourservername-or-IP/openfiredocs/ |
To reiterate, this is NOT an essential step in the installation process and only provides local access to the documentation. | To reiterate, this is NOT an essential step in the installation process and only provides local access to the documentation. | ||
| Line 131: | Line 176: | ||
signal-event remoteaccess-update | signal-event remoteaccess-update | ||
| + | ---- | ||
[[Category:Howto]] | [[Category:Howto]] | ||
| + | [[Category: Social Media Apps]] | ||
Latest revision as of 17:13, 30 March 2016
Description
Openfire (formerly Wildfire) is a real time collaboration (RTC) server dual-licensed under the Open Source GPL and commercially. It uses the only widely adopted open protocol for instant messaging, XMPP (also called Jabber). Openfire is easy to setup and administer, but offers rock-solid security and performance.
Prerequisite for SME 9.x
The Java Runtime Environment included in the Openfire RPM requires that an additional library be installed 64-bit versions of SME 9.0. To install it, run
# yum install glibc.i686
Download and install Openfire
You can find the latest version of Openfire at http://www.igniterealtime.org/downloads/index.jsp. Download the RPM to your SME server, then run
# yum install openfire-*.rpm
Create the Database
To create the Openfire Database, you'll need to perform each of the following steps:
# mysqladmin create openfiredb
# mysql -e "grant all privileges on openfiredb.* to openfireuser@localhost identified by 'yourpassword'"
# mysql -e "flush privileges"
Edit the database schema (this change does not seem to be necessary with SME 9.0 and Openfire 3.9.3):
# cd /opt/openfire/resources/database
# nano openfire_mysql.sql
At line 57 starts:
CREATE TABLE ofRoster (
  rosterID              BIGINT          NOT NULL,
  username              VARCHAR(64)     NOT NULL,
  jid                   VARCHAR(1024)   NOT NULL,
Change the jid line from 1024 to 255 as shown:
jid VARCHAR(255) NOT NULL,
Import the revised database schema:
# mysql openfiredb < openfire_mysql.sql
Access MySQL from the local network
To use the MySQL database you will need to run a script to make port 3306 available to the Openfire Instant Messaging Server.
/sbin/e-smith/config setprop mysqld LocalNetworkingOnly no
/sbin/e-smith/expand-template /etc/my.cnf
/etc/rc.d/rc7.d/S50mysqld restart
Start the Openfire Messaging Server
/etc/rc.d/init.d/openfire start
Visit admin web page to complete Openfire configuration
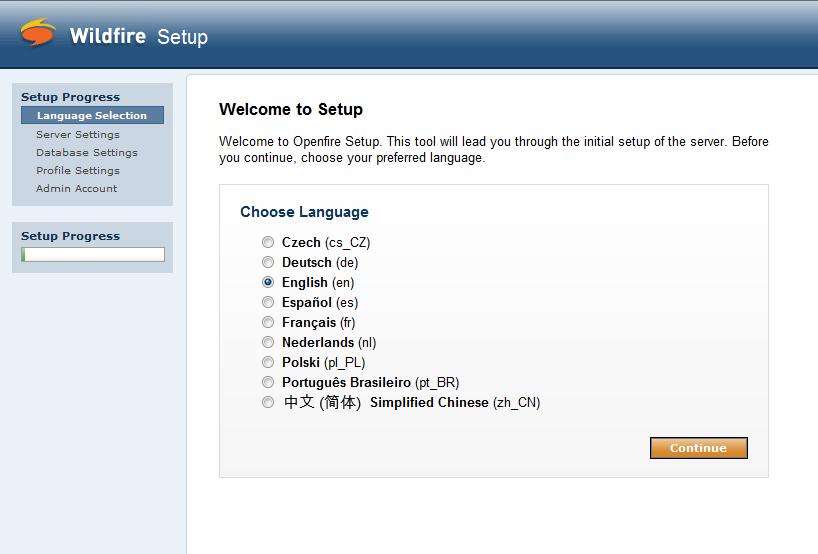
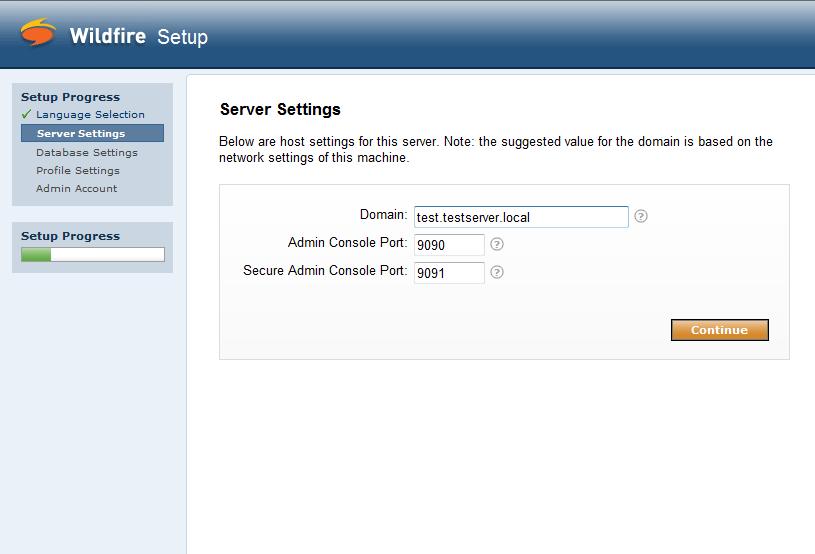
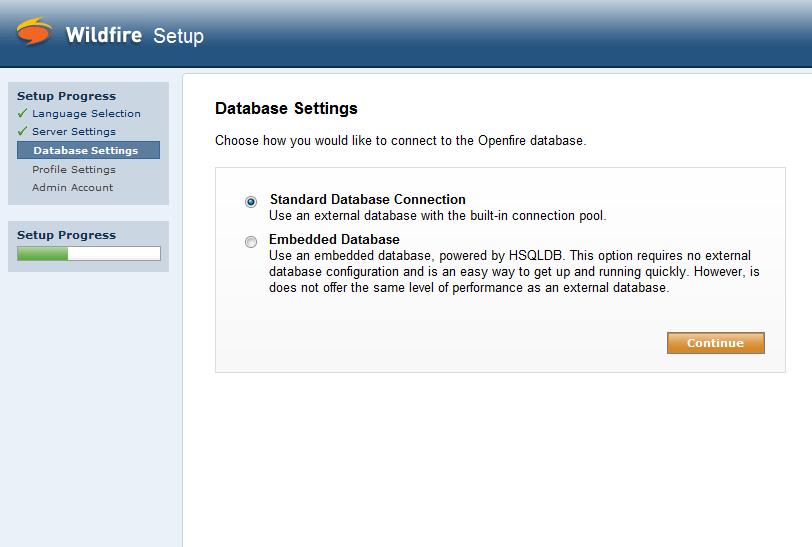
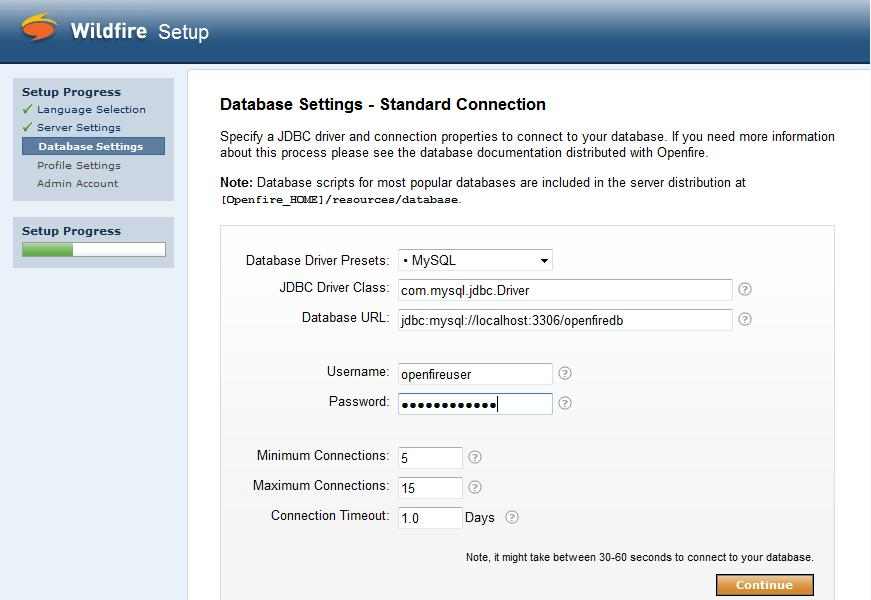
Go to http://yourserver:9090 (insecure) or https://yourserver:9091 (secure)and follow through the setup via the browser. The only area that may be confusing is the database setup area. See example configuration below.
Database Driver Presets: MySql
JDBC Driver Class: com.mysql.jdbc.Driver
Database URL: jdbc:mysql://localhost:3306/openfiredb
Username: openfireuser
Password: yourpassword
LDAP Authentication
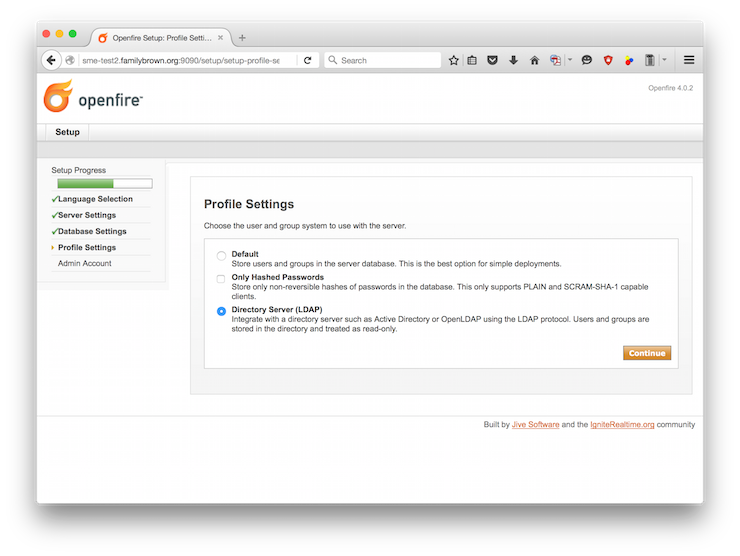
Openfire can be configured to authenticate users through your SME Server's OpenLDAP server. This will allow you to use a single user and password source, rather than needing to maintain two or more separate databases. This is recommended unless you have a particular reason to want a separate user list for your Openfire installation. To begin, on the Profile Settings screen, select Directory Server (LDAP):
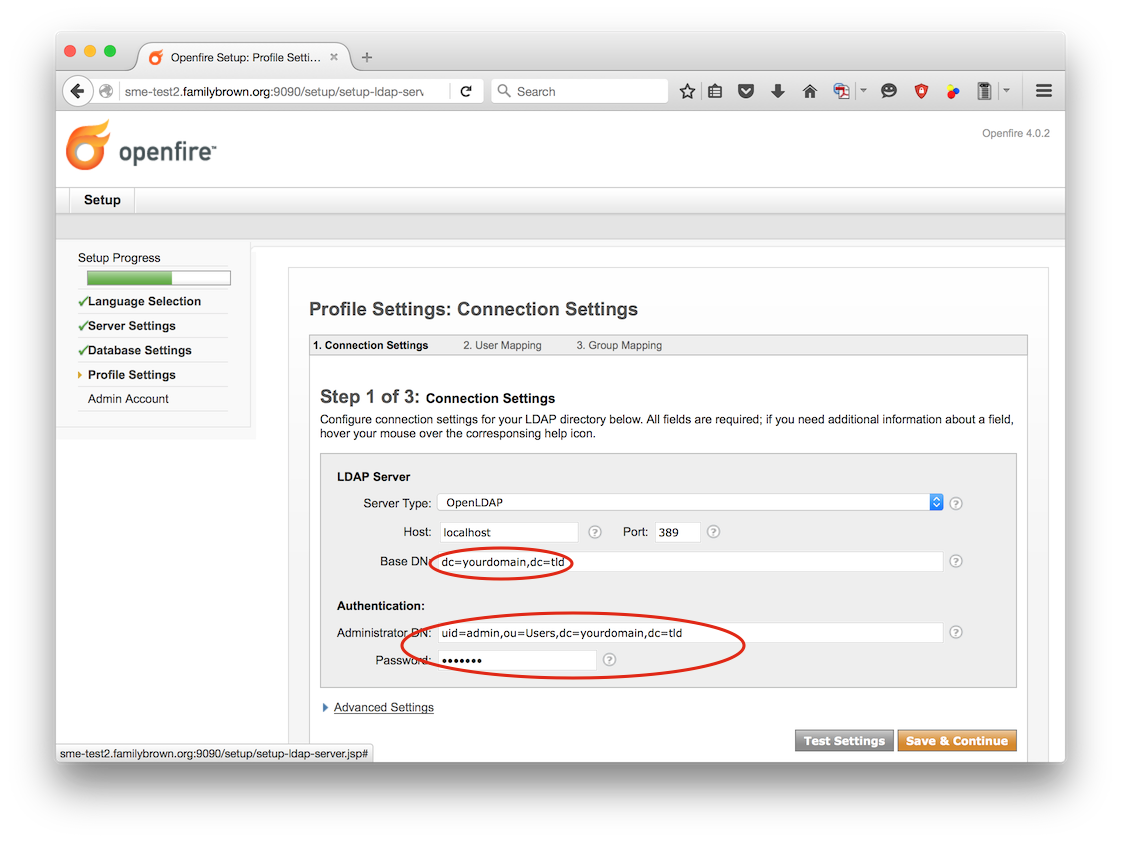
Fill in the Connection Settings screen as shown below, replacing yourdomain and tld with your primary domain name and top-level domain, as appropriate. For example, if your domain were example.com, you'd enter dc=example,dc=com. For the password field, enter your admin user's password.
Click Test Settings to make sure you're able to connect. Then click Save & Continue.
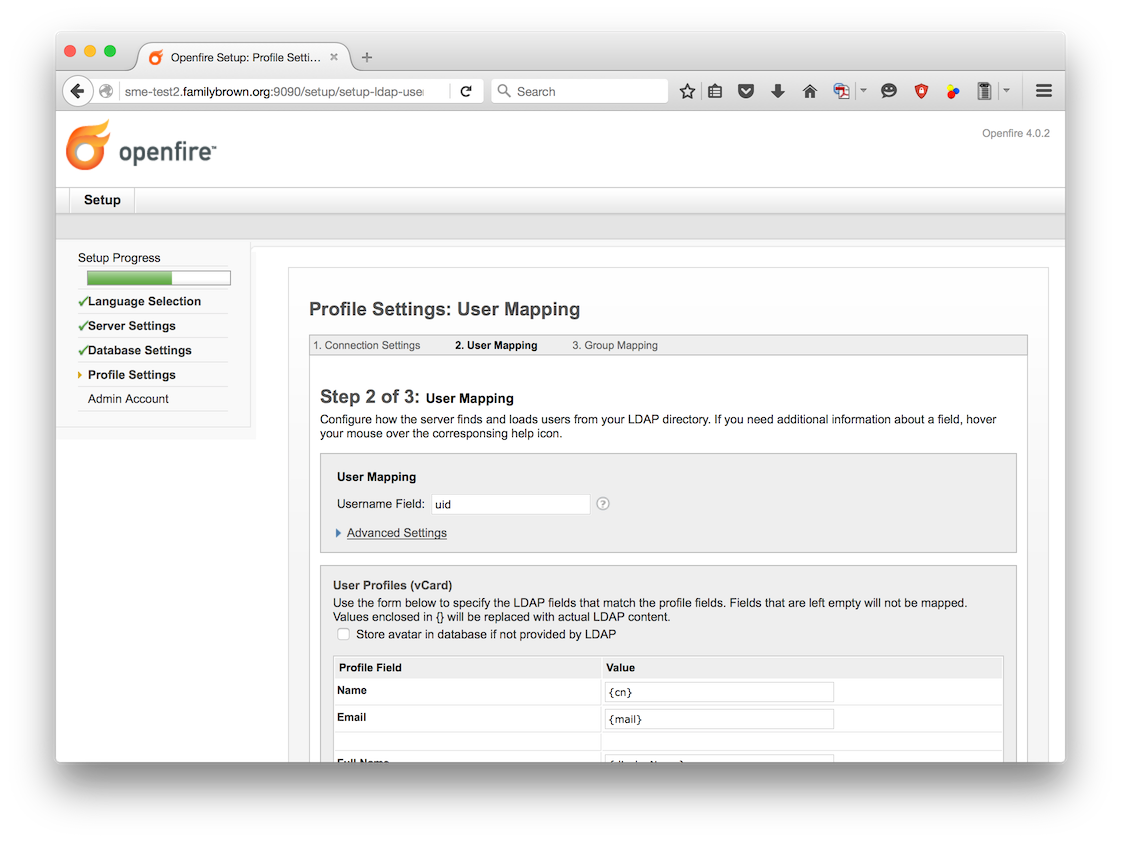
On the User Mapping page, just scroll to the bottom and click Save & Continue.
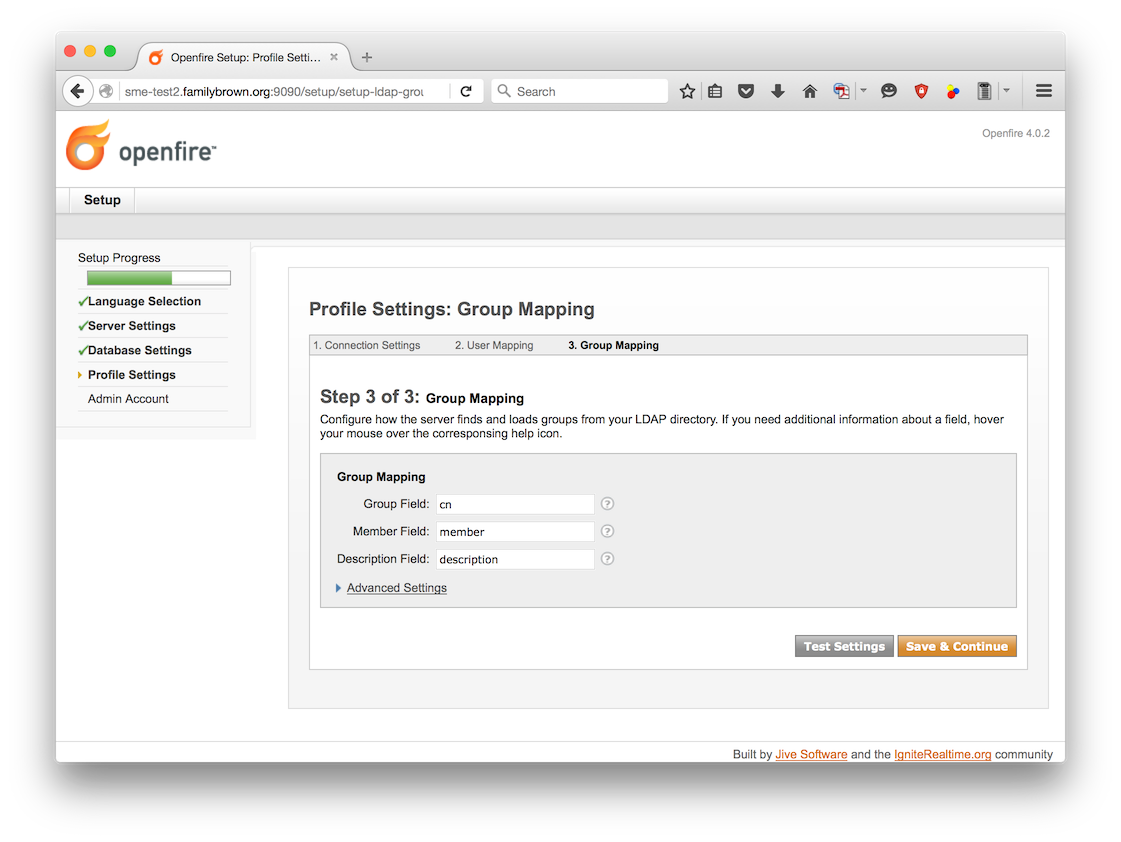
Similarly, on the Group Mapping page, click Save & Continue.
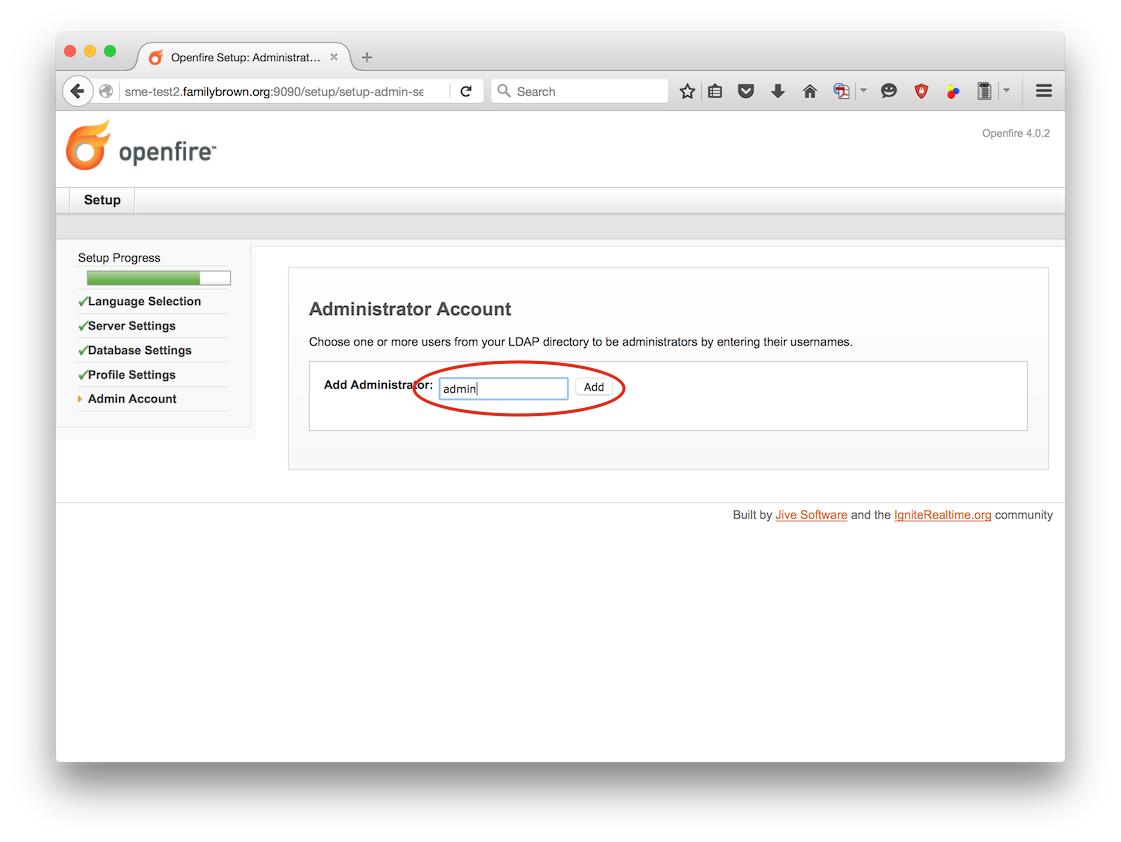
On the Administrator Account screen, enter admin and click Add.
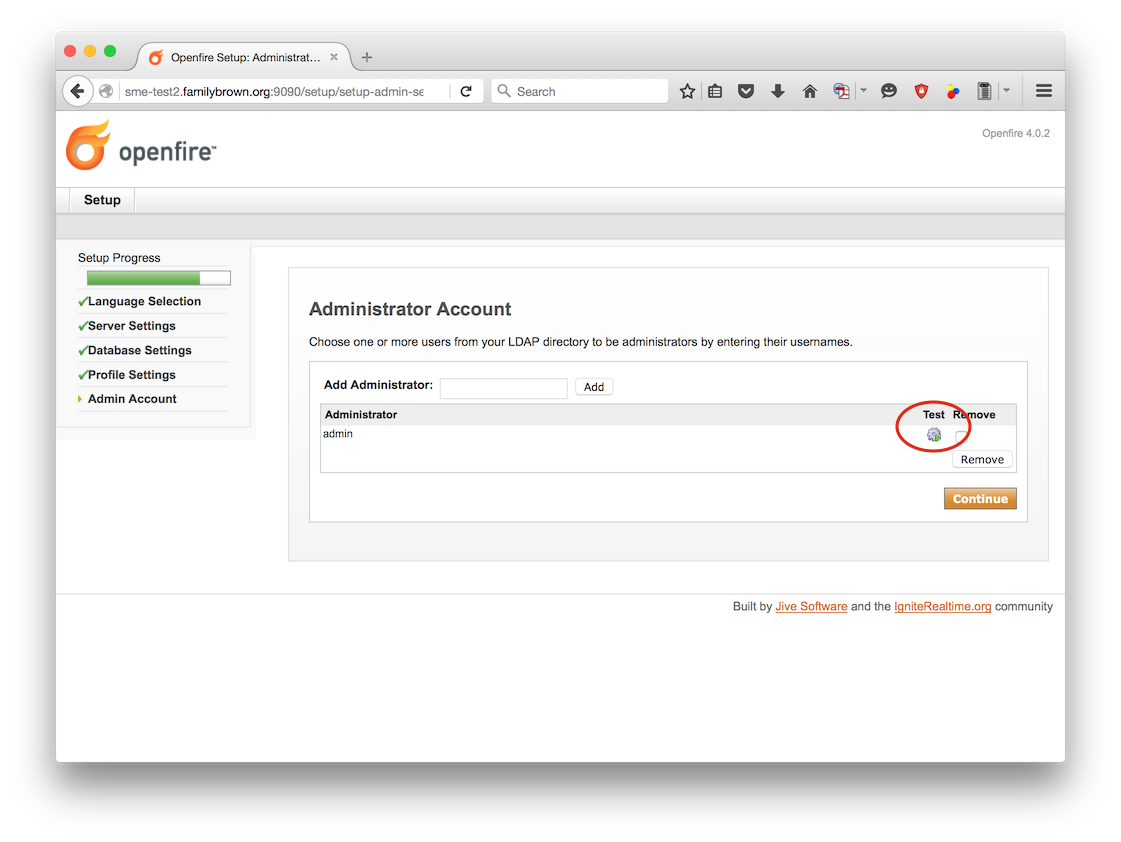
On the next page, your admin account will be listed. Click the Test button to confirm that it will authenticate this account.
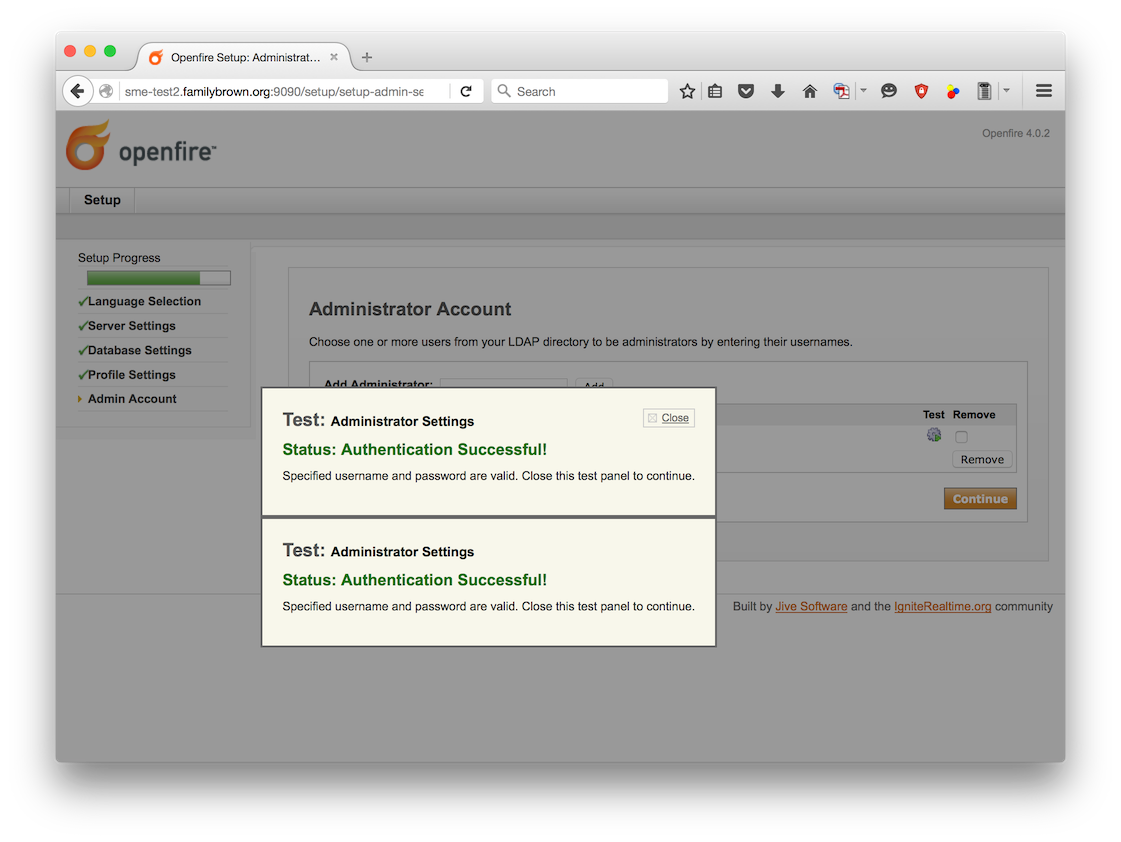
You should see the Success page below. If you do, you can close it. You can optionally add other administrator users on this page.
SME Server specific configuration
config set openfire service TCPPorts '5222,5223,7777' access public status enabled
signal-event remoteaccess-update
Add startup link:
ln -s /etc/rc.d/init.d/e-smith-service /etc/rc.d/rc7.d/S99openfire
Optional
If you would like to have web access to the openfire documentation has been installed on your server, this section will show you how to make an e-smith custom template.
Make the custom-template directory:
mkdir -p /etc/e-smith/templates-custom/etc/httpd/conf/httpd.conf
cd /etc/e-smith/templates-custom/etc/httpd/conf/httpd.conf
Create and edit a file called "99openfire"
nano -w 99openfire
(add the code shown below to the template) (you can select and copy then paste in PuTTY with right click)
# Openfire instant messaging server

Alias /openfiredocs /opt/openfire/documentation/docs

<Directory /opt/openfire/documentation/docs>
     AddType application/x-httpd-php .php .php3 .phtml
     Options Indexes +Includes FollowSymLinks
     order deny,allow
     deny from all
     allow from all
</Directory>

# end of Openfire fragment
ctrl-x to save, y to agree, and [Enter] to exit the PICO editor
Expand the template
expand-template /etc/httpd/conf/httpd.conf
/etc/rc.d/init.d/httpd-e-smith restart
access your documentation at:
http://yourservername-or-IP/openfiredocs/
To reiterate, this is NOT an essential step in the installation process and only provides local access to the documentation.
Uninstalling Openfire
Commands to remove openfire
/etc/rc.d/init.d/openfire stop
yum remove openfire
rm -Rf /opt/openfire
mysqladmin drop openfiredb
config delete openfire
signal-event remoteaccess-update
