Difference between revisions of "OTRS"
| Line 186: | Line 186: | ||
| + | [[Image:OTRS_Installer1.jpg|left]] | ||
| − | |||
cd /root | cd /root | ||
Revision as of 05:55, 6 September 2007
Maintainer
OTRS - Open Ticket Request System
OTRS is an Open source Ticket Request System (also well known as trouble ticket system) with many features to manage customer telephone calls and e-mails. The system is built to allow your support, sales, pre-sales, billing, internal IT, helpdesk, etc. department to react quickly to inbound inquiries. Do you receive many e-mails and want to answer them with a team of agents? You're going to love the OTRS!
cd /usr/local/src
wget http://ftp.otrs.org/pub/otrs/otrs-2.2.2.tar.gz
tar xvzf otrs-2.2.2.tar.gz
mv /usr/local/src/otrs-2.2.2/ /opt/otrs/
chown -R www.www /opt/otrs
Database Configuration
cp /opt/otrs/Kernel/Config.pm.dist /opt/otrs/Kernel/Config.pm
cd /opt/otrs/Kernel
edit Config.pm using vi or pico or favorite text editor & edit lines as shown below, take note of the database information as this would be required in later steps
line 41: $Self->{Database} = 'otrs';
line 44: $Self->{'DatabaseUser'} = 'otrs';
line 48: $Self->{'DatabasePw'} = 'some-pass';
pico Config.pm
# DatabaseHost
   # (The database host.)
   $Self->{DatabaseHost} = 'localhost';
   # Database
   # (The database name.)
   $Self->{Database} = 'otrs';
   # DatabaseUser
   # (The database user.)
   $Self->{DatabaseUser} = 'otrs';
   # DatabasePw
   # (The password of database user. You also can use bin/CryptPassword.pl
   # for crypted passwords.)
   $Self->{DatabasePw} = 'some-pass';
Save by pressing Ctrl x, press y to save changes and press enter
Setup Dag Repositories
The following command will configure the Dag repository on SME Server. EDIT NOT COMPLETE!
To create an entry in the database for the epel repository we open put the following commands in a terminal
window or in a shell window:
/sbin/e-smith/db yum_repositories set epel repository \
Name 'SME Server - epel' \
BaseURL 'http://<http://download.fedoraproject.org/pub/epel/7/$basearch' \
EnableGroups yes \
GPGCheck yes \
Visible no \
status disabled
To enable the changes:
signal-event yum-modify
Just to be sure, give yum a fresh start:
yum clean all
After adding it to the database we have to update the changes to the configuration file:
signal-event yum-modify
Installation of needed perl modules
yum --enablerepo=base --enablerepo=updates --enablerepo=addons --enablerepo=dag install mod_perl gd ImageMagick ImageMagick-perl gcc netpbm
Activate mod perl
config setprop modPerl status enabled
signal-event post-upgrade
yum --enablerepo=base --enablerepo=updates --enablerepo=addons --enablerepo=dag install perl-GD.i386 perl-GD-Graph.i386 perl-GD-Graph3d.noarch perl-GD-Text-Util.i386 perl-Date-Pcalc.noarch perl-Email-Valid.noarch
After you have installed all modules you can use the script otrss.checkModules to check if OTRS has all needed perl modules.
cd /opt/otrs/bin/
./otrs.checkModules


                CGI ... ok
        Date::Pcalc ... ok
       Date::Format ... ok
                DBI ... ok
         DBD::mysql ... ok
        Digest::MD5 ... ok
   Crypt::PasswdMD5 ... ok
     LWP::UserAgent ... ok
         IO::Scalar ... ok
           IO::Wrap ... ok
       MIME::Base64 ... ok
        MIME::Tools ... ok
     Mail::Internet ... ok
           Net::DNS ... ok
          Net::POP3 ... ok
          Net::LDAP ... ok
          Net::SMTP ... ok
       Authen::SASL ... ok
                 GD ... ok
           GD::Text ... ok
          GD::Graph ... ok
   GD::Graph::lines ... ok
    GD::Text::Align ... ok
        XML::Parser ... ok
           PDF::API2 ... not installed! (for PDF output - not required)
     Compress::Zlib ... ok
Execute also the three commands perl -cw bin/cgi-bin/index.pl and perl -cw bin/PostMaster.pl after changing into the directory /opt/otrs. If the output of both commands is "syntax OK", you have a proper perl installation to use with OTRS.
cd /opt/otrs
perl -cw bin/cgi-bin/installer.pl
bin/cgi-bin/installer.pl syntax OK
perl -cw bin/cgi-bin/index.pl
bin/cgi-bin/index.pl syntax OK
perl -cw bin/PostMaster.pl
bin/PostMaster.pl syntax OK
Configuring the apache web server
mkdir -p /etc/e-smith/templates-custom/etc/httpd/conf/httpd.conf/
cd /etc/e-smith/templates-custom/etc/httpd/conf/httpd.conf/
pico 89otrs
copy and paste between dotted lines
==========================================================================

#OTRS

Alias /otrs/ "/opt/otrs/bin/cgi-bin/"
Alias /otrs-web/ "/opt/otrs/var/httpd/htdocs/"
Alias /otrs/public "/opt/otrs/bin/cgi-bin/"

PerlRequire /opt/otrs/scripts/apache2-perl-startup.pl

PerlModule Apache::Reload
PerlInitHandler Apache::Reload

MaxRequestsPerChild 400

<Location /otrs>
   ErrorDocument 403 /otrs/customer.pl
   ErrorDocument 403 /otrs/index.pl
   AllowOverride All
   SetHandler perl-script
   PerlResponseHandler ModPerl::Registry
   PerlOptions +ParseHeaders
   Options +ExecCGI +FollowSymlinks
</Location>
<Directory "/opt/otrs/bin/cgi-bin/">
           AllowOverride None
           Options +ExecCGI -Includes
           Order allow,deny
           Allow from all
</Directory>
<Directory "/opt/otrs/var/httpd/htdocs/">
         AllowOverride None
         Order allow,deny
         Allow from all
</Directory>

=========================================================================
Save by pressing Ctrl x, press y to save changes and press enter
expand-template /etc/httpd/conf/httpd.conf
/etc/rc.d/init.d/httpd-e-smith restart
cd /opt/otrs
sh SetPermissions.sh /opt/otrs www www
Configuring the database using the web installer
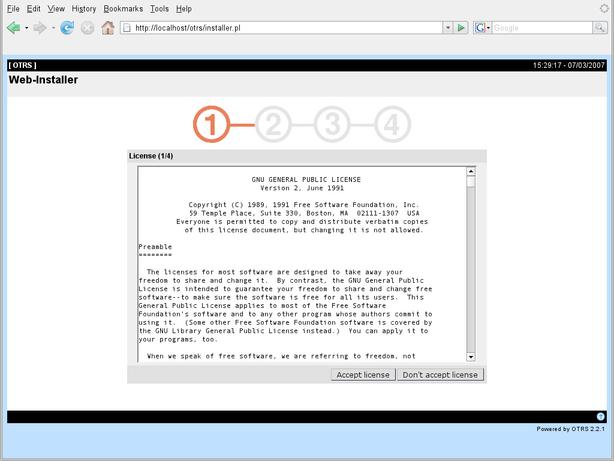
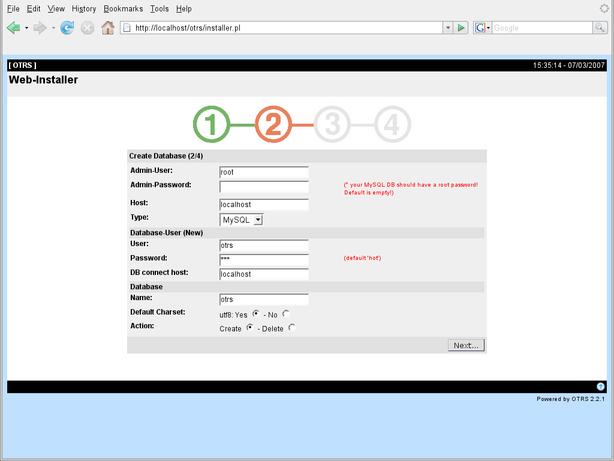
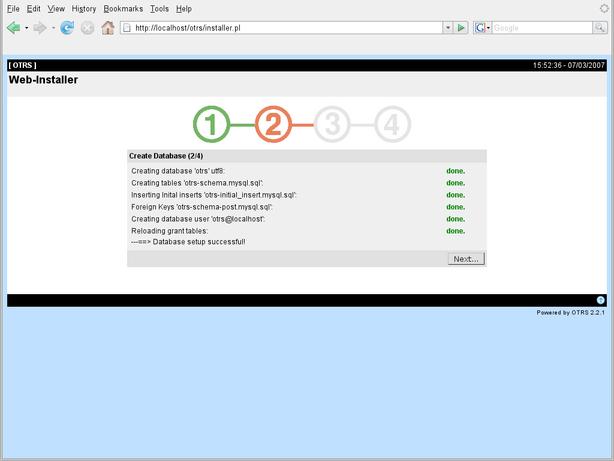
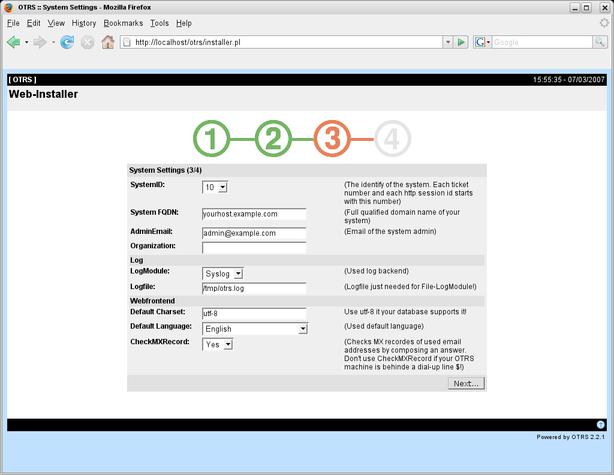
Go to URL http://localhost or ip/otrs/installer.pl to access the start page of the web installer. Just follow the few steps through the installation process you will need to configure the OTRS database via a web front-end If you are using MySQL for database back-end.
cd /root
open or edit .my.cnf and copy and paste your mysql password into the Admin Password field as shown below
example
[client]
password=eox24kly-example-of-wat-the-mysql-psw-looks-like-aB8Zva6NezKT58bcLM7QsdOAJcmPj
you will also need to add the database name, database user name & password created as well as the from the database configuration that was done in the steps above Database Configuration
if all went well, press next
Add your details & press next
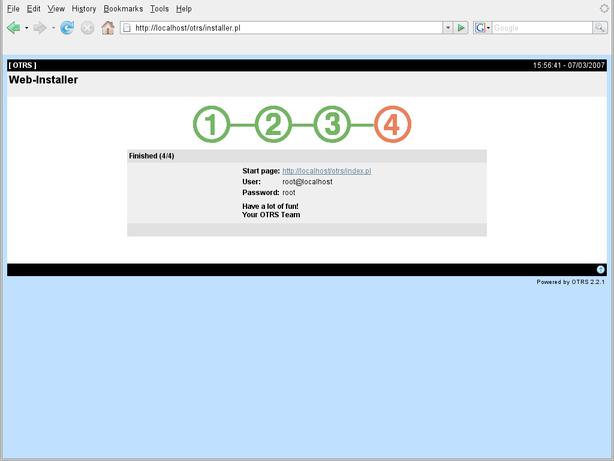
Remember the user name and password and click on the start page link
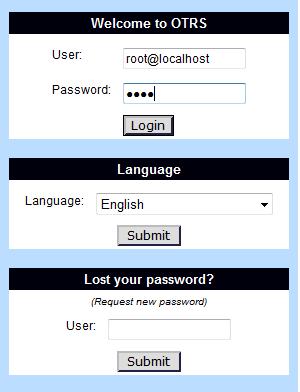
Login details
user: root@localhost
password: root
Setting up the cron jobs for OTRS
need assistance
Setting up the cron jobs for OTRS
OTRS needs some cron jobs to work properly. The cron jobs should be run with the same user rights that were specified for the OTRS modules. That means that the cron jobs must be inserted into the crontab file of the OTRS user.
All scripts with the cron jobs are located in var/cron in the home directory of the OTRS user.
