Difference between revisions of "B2evolution"
From SME Server
Jump to navigationJump to search| Line 68: | Line 68: | ||
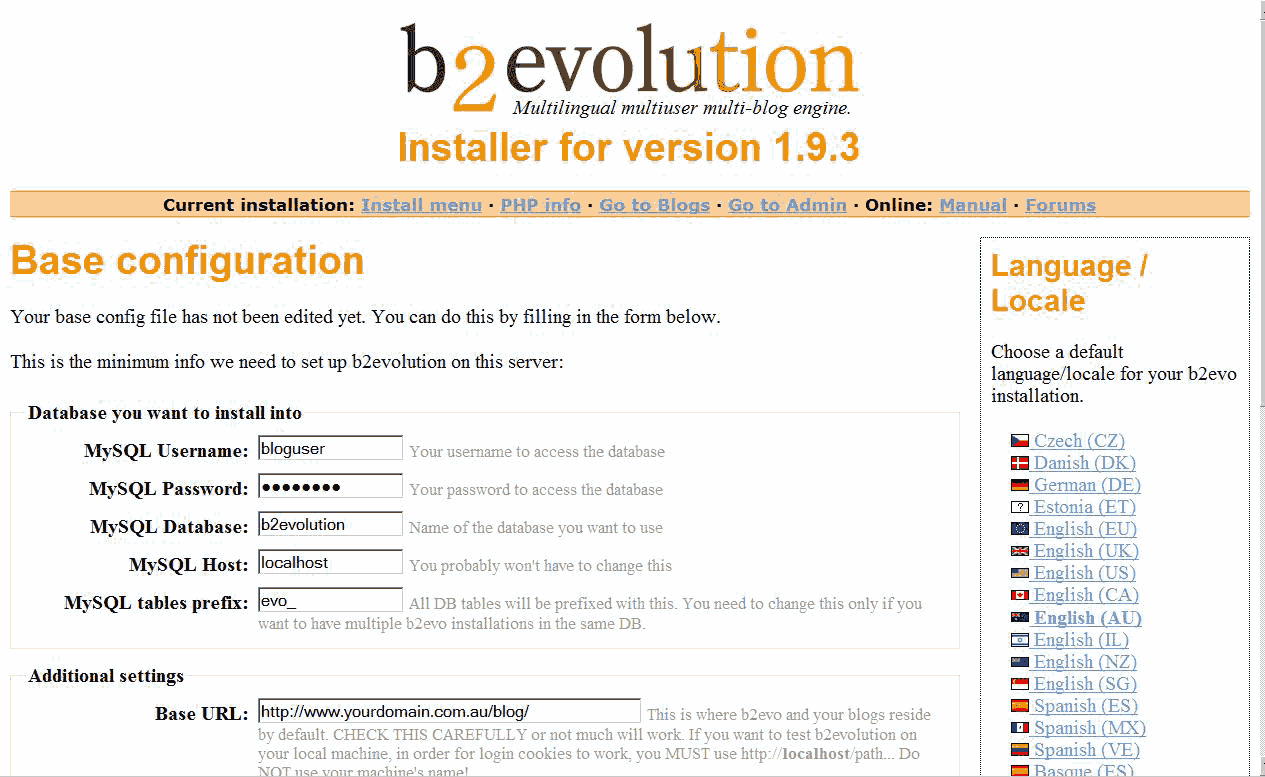
Go to your web browser and open http://your.domain.or.IP/blog/install/index.php | Go to your web browser and open http://your.domain.or.IP/blog/install/index.php | ||
| − | You will need the database user name and password created in the database setup for this step | + | You will need the database user name and password created in the database setup for this step, then once finished filling in the details select Then select the '''update config file''' at the bootom of page to continue |
| − | |||
[[Image:B2evolution_installer.png]] | [[Image:B2evolution_installer.png]] | ||
---- | ---- | ||
[[Category: Howto]] | [[Category: Howto]] | ||
Revision as of 17:18, 26 April 2007
b2evolution How To
Under Construction
b2evolution is a free blog tool for the next generation of blogs.
It includes all the features of traditional blog tools, and extends them with evolved features such as file & photo management, advanced skinning, multiple blogs support as well as detailed user permissions... Not to mention third party plug-ins!
Plus, it's free, open-source (GPL), it runs on virtually any webserver featuring PHP+MySQL and it's available in many languages!
Download b2evolution
mkdir /tmp/downloads
cd /tmp/downloads
wget http://downloads.sourceforge.net/evocms/b2evolution-1.9.3-2007-03-10.zip
unzip b2evolution-1.9.3-2007-03-10.zip
mv /tmp/downloads/b2evolution /opt/
Create a Custom Template
cd /etc/e-smith/templates-custom/etc/httpd/conf/httpd.conf/
pico 89b2evolution
 # b2evolution

Alias /blog /opt/b2evolution/blogs
<Directory /opt/b2evolution/blogs>
    Options -Indexes
    AllowOverride None
     order deny,allow
     deny from all
     allow from all
     AuthName "b2evolution"
     AuthType Basic
     AuthExternal pwauth
     Satisfy all
     AddType application/x-httpd-php .php .php3
     php_flag  magic_quotes_gpc  on
     php_flag  track_vars        on
</Directory>
Save by pressing Ctrl x, press y to save changes and press enter
expand-template /etc/httpd/conf/httpd.conf
/etc/rc.d/init.d/httpd-e-smith restart
Create Database
mysql -e "create database b2evolution"
mysql -e "grant all privileges on b2evolution.* to bloguser@localhost identified by 'yourpassword'"
mysql -e "flush privileges"
Still Under Underconstruction
chown -R www.www /opt/b2evolution
chmod 755 /opt/b2evolution
Go to your web browser and open http://your.domain.or.IP/blog/install/index.php
You will need the database user name and password created in the database setup for this step, then once finished filling in the details select Then select the update config file at the bootom of page to continue
