Difference between revisions of "Egroupware"
| Line 25: | Line 25: | ||
For installation run the following commands: | For installation run the following commands: | ||
| − | db yum_repositories set | + | db yum_repositories set egroupware repository \ |
Name "server_eGroupWare" \ | Name "server_eGroupWare" \ | ||
BaseURL http://download.opensuse.org/repositories/server:/eGroupWare/CentOS_5/ \ | BaseURL http://download.opensuse.org/repositories/server:/eGroupWare/CentOS_5/ \ | ||
| Line 35: | Line 35: | ||
signal-event yum-modify | signal-event yum-modify | ||
| − | yum install smeserver-egroupware --enablerepo= | + | yum install smeserver-egroupware --enablerepo=egroupware,smecontribs |
signal-event post-upgrade; signal-event reboot | signal-event post-upgrade; signal-event reboot | ||
* For SME 9 | * For SME 9 | ||
| − | {{Note box|due to the recent stable release of egroupware-epl, all rpm called eGroupware are now obsolete and you cannot install them from the official repository. During the time needed for doing a new package smeserver-egroupware, they will be available in the [[stephdl]] repository}} | + | {{Note box|due to the recent stable release of egroupware-epl, all rpm called eGroupware are now obsolete and you cannot install them from the official repository. During the time needed for doing a new package smeserver-egroupware-epl, they will be available in the [[stephdl]] repository}} |
For installation run the following commands: | For installation run the following commands: | ||
Revision as of 10:04, 6 September 2014
Description
eGroupWare is a free enterprise ready groupware software for your network. It enables you to manage contacts, appointments, todos and many more for your whole business.
eGroupWare is a groupware server. It comes with a native web-interface which provides the ability to access your data from any platform with a web browser, both inside and outside the local network. Moreover you also have the choice to access the eGroupWare server with your favorite groupware client (Kontact, Evolution, Outlook) and also with your mobile or PDA via SyncML.
eGroupWare is international. At this time, it supports more than 25 languages including rtl support.
For more information see http://www.egroupware.org/.
With this RPM you can use eGroupWare on your SME 7.x (and above). You can install it as one single package in a very comfortable way.
eGroupWare 1.8.005 for SME 8.0 and above
Maintainers
Installation
see Server_eGroupWare to enable the egroupware repository
- For sme8
For installation run the following commands:
db yum_repositories set egroupware repository \
Name "server_eGroupWare" \
BaseURL http://download.opensuse.org/repositories/server:/eGroupWare/CentOS_5/ \
EnableGroups no GPGCheck yes \ Name "eGroupware (CentOS_5)" \
GPGKey http://download.opensuse.org/repositories/server:/eGroupWare/CentOS_5/repodata/repomd.xml.key \
Visible yes status disabled
then
signal-event yum-modify
yum install smeserver-egroupware --enablerepo=egroupware,smecontribs
signal-event post-upgrade; signal-event reboot
- For SME 9
For installation run the following commands:
 db yum_repositories set stephdl repository \
BaseURL http://mirror.de-labrusse.fr/smeserver/\$releasever \
EnableGroups no GPGCheck yes \
Name "Mirror de Labrusse" \
GPGKey http://mirror.de-labrusse.fr/RPM-GPG-KEY \
Visible yes status disabled
You have to enable epel repository http://wiki.contribs.org/Epel
For SME 9.x,
/sbin/e-smith/db yum_repositories set epel repository \
Name 'Epel - EL6' \
BaseUrl 'http://download.fedoraproject.org/pub/epel/6/$basearch' \
MirrorList 'http://mirrors.fedoraproject.org/mirrorlist?repo=epel-6&arch=$basearch' \
EnableGroups no \
GPGCheck yes \
GPGKey http://dl.fedoraproject.org/pub/epel/RPM-GPG-KEY-EPEL \
Visible no \
status disabled
then
signal-event yum-modify
yum install smeserver-egroupware --enablerepo=stephdl,epel
signal-event post-upgrade; signal-event reboot
see the bugzilla:8438, the contribs is pending its release in smecontribs for SME Server 9.0
Configuration
Update/Upgrade
Please note that this RPM cannot upgrade eGroupWare 1.2.x
Please note that this RPM cannot fully upgrade eGroupWare 1.4.x and 1.6.x : some manual steps are necessary
first
For installation run the following commands:
db yum_repositories set server_eGroupWare repository \
Name "server_eGroupWare" \
BaseURL http://download.opensuse.org/repositories/server:/eGroupWare/CentOS_5/ \
EnableGroups no GPGCheck yes \ Name "eGroupware (CentOS_5)" \
GPGKey http://download.opensuse.org/repositories/server:/eGroupWare/CentOS_5/repodata/repomd.xml.key \
Visible yes status disabled
Visible yes status disabled then
signal-event yum-modify
yum install smeserver-egroupware --enablerepo=server_eGroupWare,smecontribs
Then you will have to :
- copy your main config file, /opt/egroupware/header.inc.php, and gallery2, phpsysinfo from opt/egroupware to /usr/share/egroupware
cp -a /opt/egroupware/html/header.inc.php /usr/share/egroupware/header.inc.php
cp -a /opt/egroupware/html/gallery/gallery2/config.php /usr/share/egroupware/gallery/gallery2/config.php
cp -a /opt/egroupware/html/phpsysinfo/config.php /usr/share/egroupware/phpsysinfo/config.php
- edit these file to reflect new paths
vim /usr/share/egroupware/header.inc.php
- define('EGW_SERVER_ROOT','/opt/egroupware/html'); to define('EGW_SERVER_ROOT','/usr/share/egroupware');
- define('EGW_INCLUDE_ROOT','/opt/egroupware/html'); to define('EGW_INCLUDE_ROOT',EGW_SERVER_ROOT);
- then comment out the followings
- define('PHPGW_SERVER_ROOT','/opt/egroupware/html');
- define('PHPGW_INCLUDE_ROOT','/opt/egroupware/html');#
vim /usr/share/egroupware/gallery/gallery2/config.php
$gallery->setConfig('data.gallery.base', '/opt/egroupware/files/g2data/'); to $gallery->setConfig('data.gallery.base', '/var/lib/egroupware/default/files/g2data/');
- manually migrate personal data ( i.e. :File Manager files) from /opt/egroupware to /usr/share/egroupware and /var/lib/egroupware/default
mv /opt/egroupware/files /var/lib/egroupware/default/files
- database will remain the same and will be updated
- gallery user might have to move their g2data if they moved it outside of files directory
- mydms user should move their files to filemanager PRIOR update or manually install last 1.6 available version and configure it.
- Go to https://YOURIP/egroupware/setup and update your header.conf to new version as requested
- Finally, you must finish the upgrade at the Config-Admin Setup with your existing credentials
- login now to conf-admin and first before upgrading your db you must go to "configuration and update your paths :
- Enter the full path for users and group files. from /opt/egroupware/files to /var/lib/egroupware/default/files
- Enter the full path to the backup directory. from /opt/egroupware/backup to /var/lib/egroupware/default/backup
- Enter the full path for temporary files. from /opt/egroupware/tmp to /usr/share/egroupware_tmp
- Then click on upgrade to upgrade DB...
- last step you have to go to Application and do the following
- check the boxes to install groupdav and phpfreechat
- check the boxes to delete db for icalsrv-Sources, notifywindow, however it is safe to keep them.
- if you never used mydms you can check the box to delete db too, however it is safe to keep it.
Then re-check your install
If all went ok, upgrade is done!
A backup is done by the RPM before updating. All Files and MySQL DataBase are saved in /opt/eGW_RPM_BACKUP You must move the backup to a safe directory.
This automatic step is just for safety, make your own backup before updating/upgrading.
Uninstallation
To uninstall use the following command:
yum remove `rpm -qa|grep -i eGroupware`
If you want to completely remove eGroupWare from your server, you need the following command:
sh /root/eGW-Full-Uninstall.sh
This will delete eGroupWare's installation files, MySQL database and SME database entries.
Configuration
add back mydms
Last available version for eGroupware is for 1.6 :
yum install eGroupware-mydms --enablerepo=server_eGroupWare
then you will have to edit the mydms setup file vim /usr/share/egroupware/mydms/setup/setup.inc.php
'versions' => Array('1.4','1.5','1.6','1.7')
to
'versions' => Array('1.4','1.5','1.6','1.7','1.8')
then go to web interface to configure your app and update the db.
eGroupWare 1.4.004 for SME 7.x
Maintainers
Dietmar Berteld
mailto:dietmar@berteld.com
Sylvain Gomez
mailto:sylvaingomez@free.fr
Stéphane Gauvin
mailto:sgauvin@serviceinfosg.com
Andrea Sacchetti
mailto:studiosacchetti@gmail.com
Installation
For installation run the following commands:
wget http://mirror.contribs.org/contribs/sgomez/contribs/egroupware/smeserver-egroupware-1.4.004-1.noarch.rpm
yum localinstall smeserver-egroupware-1.4.004-1.noarch.rpm
The rpm is about 26Mbytes in size, so may take some minutes to download.
Update/Upgrade
Please note that this RPM cannot upgrade eGroupWare 1.2.x
Then, you can update your existing 1.4 installation with
rpm -Uvh smeserver-egroupware-1.4.004-1.noarch.rpm
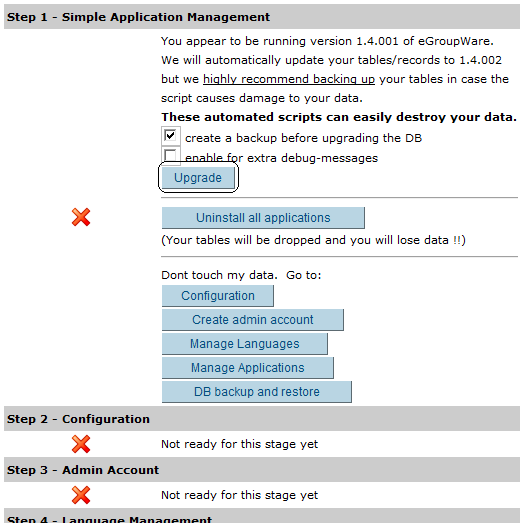
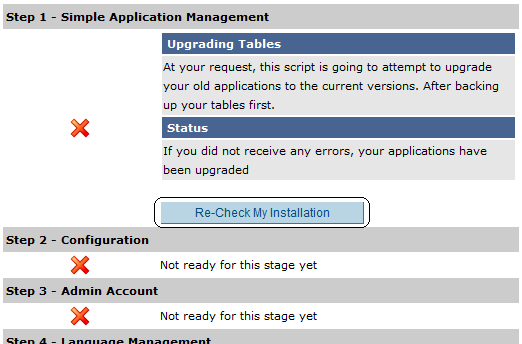
If you were upgrading eGroupWare version (i.e.1.4.001 to 1.4.002) you must finish the upgrade at the Config-Admin Setup with your existing credentials. Then click on upgrade...
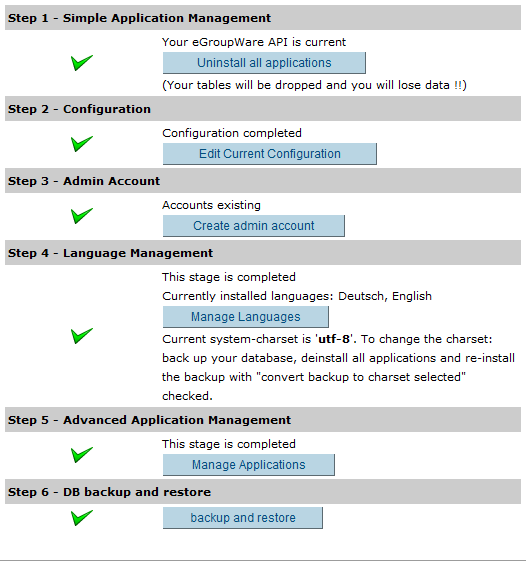
Then re-check your install
If all went ok, upgrade is done!
A backup is done by the RPM before updating. All Files and MySQL DataBase are saved in /opt/eGW_RPM_BACKUP You must move the backup to a safe directory.
This automatic step is just for safety, make your own backup before updating/upgrading.
Uninstallation
To uninstall use the following command:
yum remove smeserver-egroupware
In the new release (1.4.002-x), if you want to completely remove eGroupWare from your server, you need the following command:
sh /root/eGW-Full-Uninstall.sh
This will delete eGroupWare's installation files, MySQL database and SME database entries.
Starting with eGroupWare
Please perform the Intial Configuration FIRST before login to eGroupWare. After that SME users can login to eGroupWare with their used SME account + password. At first login, eGroupWare creates user accounts and passwords automatically and synchronize them to the SME Server.
Inital Configuration
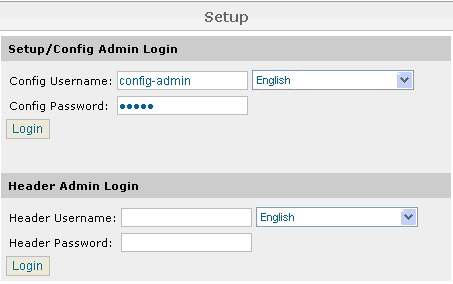
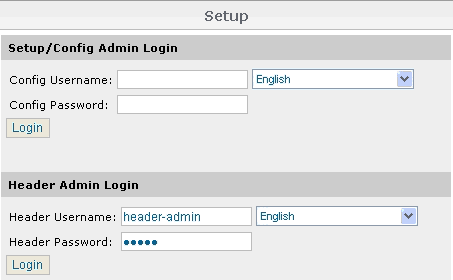
You can find eGroupWare in the /opt/egroupware directory. For using eGroupWare start your browser with the URL http://servername/egroupware/setup and logon with the user config-admin + password admin at Setup/Config Admin Login.
Now you should create eGroupWare's admin-account. Because eGroupWare uses mail authentication, the admin-account must be a valid SME account/password. This account will be able to use and administer eGroupWare.
Logout after creating the admin account.
Changing passwords for eGW config-admin / header-admin
Go to your browser and logon with the user header-admin + password admin at Header Admin Login.
Change the passwords for the users config-admin and header-adminnow:
Store the new passwords with "Write".
Adjusting accessibility
The default behaviour of eGroupWare is: accessible from LAN + Internet with "forced https" (with SSL on and a rewrite rule to force a redirection to the SSL page) You can easily change those defaults settings with following commands:
# config setprop egroupware HTTPS on
# config setprop egroupware HTTPS off
# config setprop egroupware PublicAccess global
# config setprop egroupware PublicAccess local
Once done, apply modifications and restart Apache:
# expand-template /etc/httpd/conf/httpd.conf
# service httpd-e-smith restart
Synchronization
eGroupWare provides Synchronization of calender, todo's, notes and addressbook with offline-clients like MS Outlook and PDA's. Unfortunally there is a requirement for PHP5 to accomplish these functions, which is not implemented in SME 7. But actually it is possible to sync to MS Outlook with the xmlrpc protocol and the eGWOSync application.
MS Outlook Synchronization
You can sync eGroupWare-Data to MS Outlook as follows:
1. Install certificate with MS Internet Explorer
- Start Internet Explorer
- Enter URL = https://servername
- Enter "show certificate"
- Enter "install certificate" and go on to install your SME certificate
2. MS Outlook
- Close your MS Outlook if active.
- Go to system control, register mail.
- show profiles... -> delete all profiles
- Start MS Outlook, create a new profile with your mail account
3. eGWOSync
Download eGWOSync and .NET, if necessary. If your .NET release is newer than version 1.x, you must install both versions on your system.
- You need .NET Version 1.x, eGWOSync accepts no newer versions
- User/Password = SME user account/password
- Domain = default
- Hostname = SME domain
- Port = 443
- Use SSL = enabled
- URL = keep default values
- Perform test
4. Funambol
Download Web site: Funambol Web Site Download Funambol 6.5.7 link [1]
1) Install the last Funambol Plugin
2) Change "7" to "0" for mbstring.func_overload = 0 in php.ini
3) Open Outlook go to the Funambol Setup (Funambol --> Option)
4) Select all items
5) lower the log level in /opt/egroupware/phpgwapi/inc/horde/config/conf.php (change $conf['log']['priority'] = PEAR_LOG_DEBUG to $conf['log']['priority'] = PEAR_LOG_INFO)
6) Setup options:
ACCOUNT
Location = http://Domain Name/egroupware/rpc.php or http://Server IP/egroupware/rpc.php
Username = Your user login name for eGroupWare
Password = Your user password for eGroupWare
SYNC
CONTACTS
Sync Direction = Two-Way
Remote name = ./sifcontacts
Data Format = SIF
CALENDAR
Sync Direction = Two-Way
Remote name = ./sifcalendar
Data Format = SIF
TASKS
Sync Direction = Two-Way
Remote name = ./siftasks
Data Format = SIF
NOTES
Sync Direction = Two-Way
Remote name = ./sifnotes
Data Format = SIF
NOTES:
To get success with synchronisation put thoses settings in .htaccess file in the root folder of egroupware (/opt/egroupware/html/.htaccess):
Run this on PuTTY (NOTE: this does not appear to work SME7.3, leaving the i-bay with an AllowOverride setting of 'none'):
- db accounts setprop egroupware AllowOverride All
- signal-event ibay-modify egroupware
.htaccess file settings:
- AddType text/xml .xml
- php_value memory_limit 32M
- php_value max_execution_time 60
- php_flag register_globals Off
- php_flag magic_quotes_gpc Off
- php_flag magic_quotes_runtime Off
- php_value upload_max_filesize 16M
- php_flag session.use_trans_sid Off
- php_value session.gc_probability 1
- php_value session.gc_divisor 10
- php_value mbstring.func_overload 7
- <Files rpc.php>
- php_value mbstring.func_overload 0
- Order allow,deny
- Allow from all
- </Files>
--- --Stéphane Gauvin -- Service Informatique SG 09:29, 1 March 2008 (MST) --Snoopyski 19:04, 20 September 2007 (MDT)
syncml configuration
From http://forums.contribs.org/index.php?topic=40242.new;topicseen#new
Here are the steps to configure syncml with egroupware:
1. Install php5-cgi as explained in this howto http://sme.firewall-services.com/spip.php?article46
(Stop after Step 3, Step 4 is just an example)
2. Create a custom-template so that rpc.php is handled by php5:
vim /etc/e-smith/templates-custom/etc/httpd/conf/httpd.conf/90egw-syncml
and enter the following:
<Location /egroupware/rpc.php>
      AddHandler php5-cgi .php
      Action php5-cgi /php5-cgi/php
</Location>
3. Edit /etc/php5/php.ini (this file has no templates so you can edit it directly)
On Line 304
memory_limit = 8M
change it to a bigger value, for example
memory_limit = 32M
On Line 1191 uncomment the line:
mbstring.func_overload = 0
(This may not be useful as php5-cgi has been compiled without mbstring support).
There is no need for a htaccess file (htaccess could configure php4 because it's an apache module but not php5-cgi).
expand-template /etc/httpd/conf/httpd.conf
sv t /service/httpd-e-smith
sv s /service/httpd-e-smith
To check syntax is OK do:
httpd -t
syncml has been tested with the Funambol plugin for Outlook (several versions) & works OK.
Gallery2 addon
Gallery2 is the first addon available for eGroupWare 1.4.002
It has been integrated in smeserver-egroupware-1.4.002-3.noarch.rpm (but not installed by default)
Description
Gallery is an open source web based photo album organizer. Gallery gives you an intuitive way to blend photo management seamlessly into your own website whether you're running a small personal site or a large community site.
For more information see http://gallery.menalto.com/.
Gallery2 install
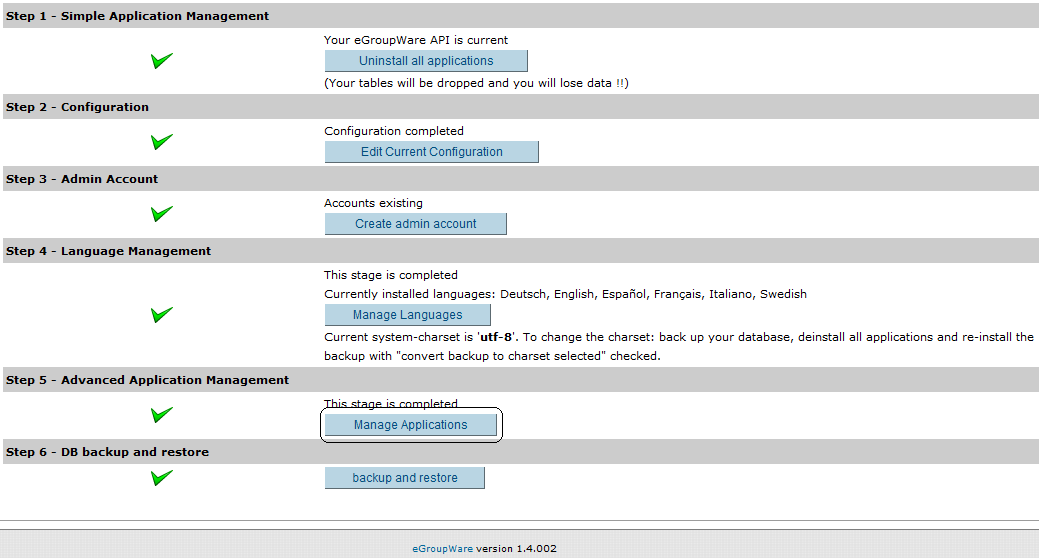
First, login at Config setup with your existing creditentials and clic on Manage Applications.
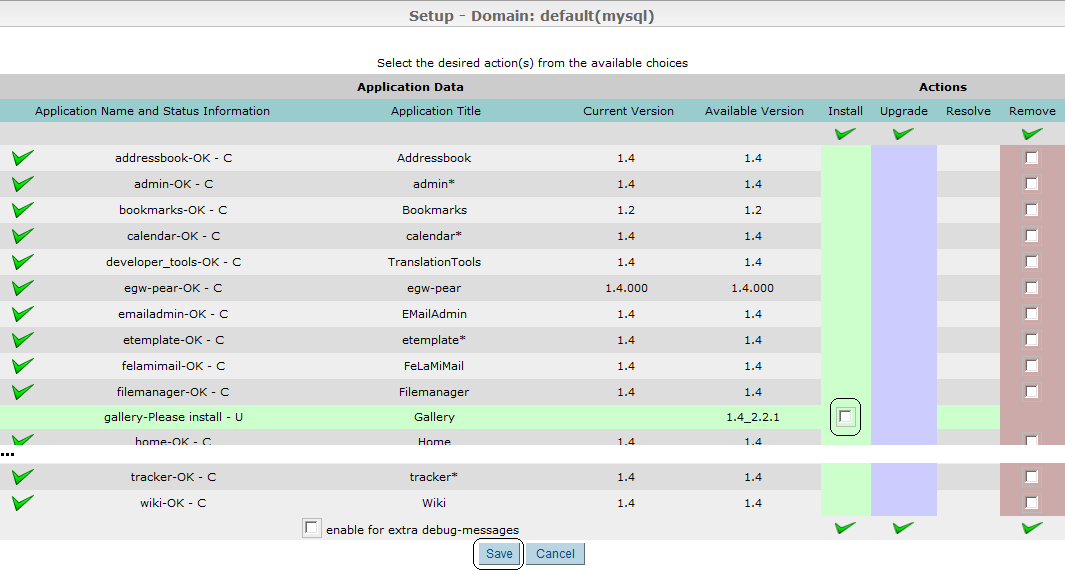
Then simply click on Gallery install checkbox and save your changes.
Gallery2 setup
Once Installed, you need to configure your website and create the database. This step has been prepared by the RPM install.
Open your web browser at https://yourdomain.com/egroupware/gallery/gallery2/install and follow instructions.
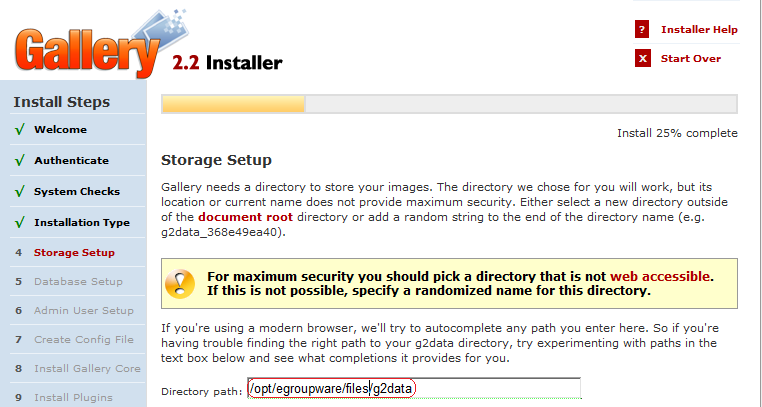
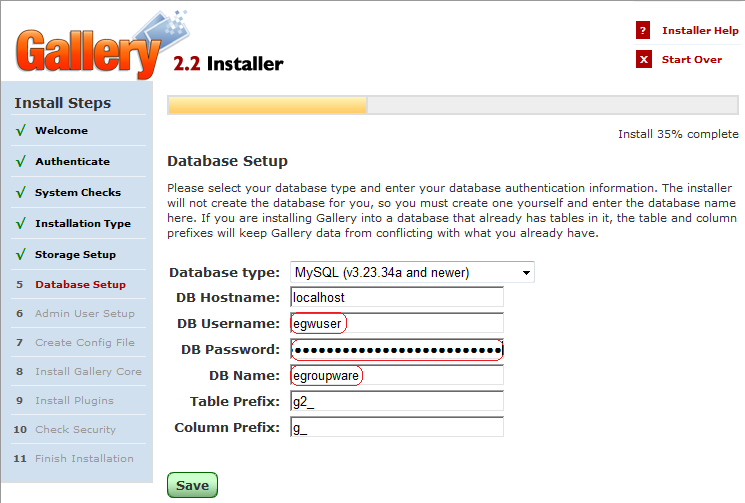
In the 4th step, you will be asked for a storage folder. RPM install has prepared /opt/egroupware/files/g2data, please don't change neither path nor permissions!
For SME8 and eGroupware 1.8.005, Defualt Path will be /var/share/default/files/g2data, please don't change neither path nor permissions!
In the 5th step, you will be asked for MySQL informations. RPM install has prepared egwuser egroupware and your DbPassword automatically. Just save and finish the install.
Gallery2 icon
Once the setup is done you can add the icon in eGroupWare's interface. Login to eGroupWare with an admin account, and edit a user or a group and add gallery
SME 8 egroupware 1.6.003
Packages for SME 8 are available, courtesy of Studio Sacchetti, with no support on bugzilla as sources are not available:
Additional information
- eGroupWare Homepage
- Gallery Homepage
- eGroupWare Documentation
- Howto Update eGroupWare
- thread at contribs.org forum
- thread at contribs.org forum
